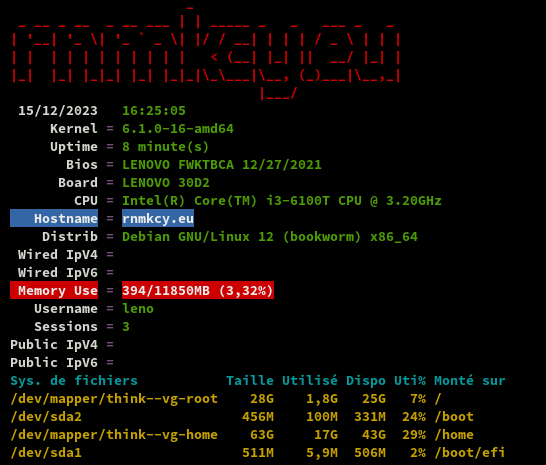
Lenovo Serveur Debian 12 rnmkcy.eu
Serveur Lenovo ThinkCentre M700 Tiny Debian 12 (bookworm), Ram 12 Go et SSD M.2 2280 500 Go
Serveur Debian 12

Installer avec clé USB contenant image ISO debian-12.1.0-amd64-netinst.iso
Machine : think
root : root49600
leno : leno49600
Disque SSD 500Go M.2
Partitions LVM avec home séparé et 100Go utilisé
La machine reboot à la fin de l’installation
Se connecter avec l’utilisateur “leno”
Relever l’adresse ip : ip a , exemple 192.168.0.11
Serveur SSH Utilitaires usuels du système
On peut également se connecter via ssh : ssh leno@192.168.0.11
Passer en su , installer sudo
1
2
3

su
apt install sudo
echo "leno     ALL=(ALL) NOPASSWD: ALL" >> /etc/sudoers
Installer le module iwlwifi pour éviter les messages d’erreur dans le bios
1

sudo apt install firmware-iwlwifi
Modifier les lignes suivantes le grub /etc/default/grub
1
2
3
4

# ajout loglevel=0
GRUB_CMDLINE_LINUX_DEFAULT="quiet loglevel=0"
# désactiver la recherche des autres OS
GRUB_DISABLE_OS_PROBER=true
Un redémarrage de la machine est obligatoire
Structure volume LVM
1
2
3
4
5
6
7

  VG        #PV #LV #SN Attr   VSize    VFree
  think-vg    1   4   0 wz--n-  464,78g 221,65g

  LV        VG        Attr       LSize   Pool Origin Data%  Meta%  Move Log Cpy%Sync Convert
  home      think-vg  -wi-ao---- <64,24g
  root      think-vg  -wi-ao---- <27,94g
  swap_1    think-vg  -wi-ao---- 976,00m
Réseau
Ip V4 statiques
configurer une adresse IPv4 en statique
1

nano /etc/network/interfaces
1
2
3
4
5

auto eno1
iface eno1 inet static
    address 192.168.0.215
    netmask 255.255.255.0
    gateway 192.168.0.254
Ip V6 statiques
On active ou pas IPV6
Activer IPV6
Pour le nexthop IPV6 FreeBox
1

ip a |grep "inet6 fe80"
inet6 fe80::223:24ff:fec9:686/64 scope link
Paramètres de la Freebox, Configuration IPV6 → Délégation de préfixe
Préfixe : 2a01:e0a:9c8:2082::/64
Next Hop : fe80::223:24ff:fec9:686
Adresse IPv- lien local : fe80::8e97:eaff:fe39:66d6
Ajout IPV6
1
2
3
4
5
6
7
8
9
10

auto eno1
iface eno1 inet static
    address 192.168.0.215
    netmask 255.255.255.0
    gateway 192.168.0.254

iface eno1 inet6 static
 address 2a01:e0a:9c8:2082::1
 netmask 64
 post-up ip -6 route add default via fe80::8e97:eaff:fe39:66d6 dev eno1
Désactiver IPV6
Pour un focntionnement correct de la messagerie, il faut désactiver IPV6 car le DNS reverse n’est pas géré
OVH - Supprimer les liens IPV6 sur le domaine rnmkcy.eu
Les lignes à supprimer dans la zone dns
1
2

         IN AAAA   2a01:e0a:9c8:2080:64de:1eff:fe0e:f3eb
*        IN AAAA   2a01:e0a:9c8:2080:64de:1eff:fe0e:f3eb
Désactiver IPV6 sur debian 12 (How to Disable IPv6 on Debian 12)
Désactiver l’IPv6 sur Debian 12 à l’aide de la configuration sysctl
Modifier le fichier de configuration sysctl
1

sudo nano /etc/sysctl.conf
Ajouter les lignes suivantes en fin de fichier
1
2
3
4

# Disabling the IPv6
net.ipv6.conf.all.disable_ipv6 = 1
net.ipv6.conf.default.disable_ipv6 = 1
net.ipv6.conf.lo.disable_ipv6 = 1
Appliquer les modifications
1

sudo sysctl -p
Redémarrer l’ordinateur
1

sudo reboot
Vérifier le status IPV6
1

sudo sysctl net.ipv6.conf.all.disable_ipv6
net.ipv6.conf.all.disable_ipv6 = 1
Le « 1 » indique que l’IPv6 a été désactivé avec succès. Pour réactiver l’IPv6 sur Debian 12, ouvrez le fichier de configuration sysctl et supprimez la ligne ajoutée.
Bridge Ip V4 V6 (OPTION)
Adresse mac interface eno1
1

ip address show dev eno1 | awk '$1=="link/ether" {print $2}'
00:23:24:c9:06:86
Installer le logiciel bridge-utils
1

apt install bridge-utils
FreeBox DMZ 192.168.0.215 pour un accès IPV4 depuis l’extérieur
FreeBox nexthop IPV6
1

ip a |grep "inet6 fe80"
inet6 fe80::223:24ff:fec9:686/64 scope link
Passage en ip statique 192.168.0.215 et 2a01:e0a:9c8:2081::1 (nexthop fe80::223:24ff:fec9:686)
lien local box : fe80::8e97:eaff:fe39:66d6
Modifier l’interface
1

nano /etc/network/interfaces
1
2
3
4
5
6
7
8
9
10
11
12
13
14
15
16
17
18
19
20
21

auto lo
iface lo inet loopback

iface eno1 inet manual

auto br0
iface br0 inet static
    address 192.168.0.215
    netmask 255.255.255.0
    gateway 192.168.0.254

    bridge_ports eno1
    bridge_stp off       # disable Spanning Tree Protocol
    bridge_waitport 0    # no delay before a port becomes available
    bridge_fd 0          # no forwarding delay

#iface br0 inet6 static
#    address 2a01:e0a:9c8:2081::1
#    netmask 64
#    gateway fe80::8e97:eaff:fe39:66d6
#    autoconf 0
Vérifier le dns
1

/etc/resolv.conf
1
2

nameserver 1.1.1.1
nameserver 192.168.0.254
Un redémarrage de la machine pour la prise en compte : systemctl reboot
Connexion sur l’adresse ip fixe
1
2
3
4

# IPV6
ssh leno@2a01:e0a:9c8:2081::1
# IPV4
ssh leno@192.168.0.215
Vérification des adresses IP
1

ip a
1
2
3
4
5
6
7
8
9
10
11
12
13
14
15
16
17

1: lo: <LOOPBACK,UP,LOWER_UP> mtu 65536 qdisc noqueue state UNKNOWN group default qlen 1000
    link/loopback 00:00:00:00:00:00 brd 00:00:00:00:00:00
    inet 127.0.0.1/8 scope host lo
       valid_lft forever preferred_lft forever
    inet6 ::1/128 scope host noprefixroute
       valid_lft forever preferred_lft forever
2: eno1: <BROADCAST,MULTICAST,UP,LOWER_UP> mtu 1500 qdisc fq_codel master br0 state UP group default qlen 1000
    link/ether 00:23:24:c9:06:86 brd ff:ff:ff:ff:ff:ff
    altname enp0s31f6
3: br0: <BROADCAST,MULTICAST,UP,LOWER_UP> mtu 1500 qdisc noqueue state UP group default qlen 1000
    link/ether 66:de:1e:0e:f3:eb brd ff:ff:ff:ff:ff:ff
    inet 192.168.0.215/24 brd 192.168.0.255 scope global br0
       valid_lft forever preferred_lft forever
    inet6 2a01:e0a:9c8:2080:64de:1eff:fe0e:f3eb/64 scope global dynamic mngtmpaddr
       valid_lft 86106sec preferred_lft 86106sec
    inet6 fe80::64de:1eff:fe0e:f3eb/64 scope link
       valid_lft forever preferred_lft forever
Redémarrage
Pour prendre en compte les modifications de la configuration réseau
1

systemctl reboot
Hostname
1
2

sudo hostnamectl set-hostname rnmkcy.eu
hostnamectl
1
2
3
4
5
6
7
8
9
10
11

 Static hostname: rnmkcy.eu
       Icon name: computer-desktop
         Chassis: desktop 🖥️
      Machine ID: 11ae731552174ae5b2dd4c60ac8fa88c
         Boot ID: e59a1b2d79d040fab620c797a19a636e
Operating System: Debian GNU/Linux 12 (bookworm)
          Kernel: Linux 6.1.0-16-amd64
    Architecture: x86-64
 Hardware Vendor: Lenovo
  Hardware Model: ThinkCentre M700
Firmware Version: FWKTBCA
Date et heure
1

timedatectl
1
2
3
4
5
6
7

               Local time: ven. 2023-12-15 16:20:37 CET
           Universal time: ven. 2023-12-15 15:20:37 UTC
                 RTC time: ven. 2023-12-15 15:20:36
                Time zone: Europe/Paris (CET, +0100)
System clock synchronized: yes
              NTP service: active
          RTC in local TZ: no
Groupe “users”
Vérifier si utilisateur appartient au groupe “users” : id leno
1

uid=1000(leno) gid=1000(leno) groupes=1000(leno),24(cdrom),25(floppy),29(audio),30(dip),44(video),46(plugdev),100(users),106(netdev)
Si non appartenance, exécuter : sudo usermod -a -G users $USER
Pour visualiser tous les messages de journal, ajouter l’utilisateur au groupe existant adm
1

sudo usermod -a -G adm $USER
OpenSSH, clé et script
![]()
Générer une paire de clé sur l'ordinateur de bureau PC1
Générer une paire de clé curve25519-sha256 (ECDH avec Curve25519 et SHA2) pour une liaison SSH avec le serveur.
1

ssh-keygen -t ed25519 -o -a 100 -f ~/.ssh/lenovo-ed25519
Envoyer les clés publiques sur le serveur lenovo
1

ssh-copy-id -i ~/.ssh/lenovo-ed25519.pub leno@192.168.0.215
On se connecte sur le serveur debian 12
1

ssh leno@192.168.0.215
Modifier la configuration serveur SSH
1

sudo nano /etc/ssh/sshd_config
Modifier
1
2

Port = 55215
PasswordAuthentication no
Relancer le serveur
1

sudo systemctl restart sshd
Test connexion
1

ssh -p 55215 -i ~/.ssh/lenovo-ed25519 leno@192.168.0.215
Utilitaires
Installer utilitaires
1

sudo apt install rsync curl tmux jq figlet git
Motd
Effacer et créer motd
1

sudo rm /etc/motd && sudo nano /etc/motd
1
2
3
4
5
6
7
8
9
10
11
12

  _                                __  __  ____  __    __
 | |    ___  _ _   ___ __ __ ___  |  \/  ||__  |/  \  /  \
 | |__ / -_)| ' \ / _ \\ V // _ \ | |\/| |  / /| () || () |
 |____|\___||_||_|\___/ \_/ \___/ |_|  |_| /_/  \__/  \__/
  _____  _     _        _     ___            _
 |_   _|| |_  (_) _ _  | |__ / __| ___  _ _ | |_  _ _  ___
   | |  | ' \ | || ' \ | / /| (__ / -_)| ' \|  _|| '_|/ -_)
   |_|  |_||_||_||_||_||_\_\ \___|\___||_||_|\__||_|  \___|
  _  ___  ___     _   __  ___     __     ___  _  ___
 / |/ _ \|_  )   / | / / ( _ )   /  \   |_  )/ || __|
 | |\_, / / /  _ | |/ _ \/ _ \ _| () |_  / / | ||__ \
 |_| /_/ /___|(_)|_|\___/\___/(_)\__/(_)/___||_||___/
Script ssh_rc_bash
ATTENTION!!! Les scripts sur connexion peuvent poser des problèmes pour des appels externes autres que ssh
1
2
3

wget https://static.xoyize.xyz/files/ssh_rc_bash
chmod +x ssh_rc_bash # rendre le bash exécutable
./ssh_rc_bash        # exécution
Parefeu UFW
![]()
UFW, ou pare - feu simple , est une interface pour gérer les règles de pare-feu dans Arch Linux, Debian ou Ubuntu. UFW est utilisé via la ligne de commande (bien qu’il dispose d’interfaces graphiques disponibles), et vise à rendre la configuration du pare-feu facile.
Installation Debian / Ubuntu
1

sudo apt install ufw
Par défaut, les jeux de règles d’UFW sont vides, de sorte qu’il n’applique aucune règle de pare-feu, même lorsque le démon est en cours d’exécution.
Les règles
1
2

sudo ufw allow 55215/tcp  # port SSH
sudo ufw allow https      # port 443
Activer le parefeu
1

sudo ufw enable
1
2

Command may disrupt existing ssh connections. Proceed with operation (y|n)? y
Firewall is active and enabled on system startup
Status
1

 sudo ufw status verbose
1
2
3
4
5
6
7
8
9
10
11

Status: active
Logging: on (low)
Default: deny (incoming), allow (outgoing), disabled (routed)
New profiles: skip

To                         Action      From
--                         ------      ----
55215/tcp                  ALLOW IN    Anywhere
443                        ALLOW IN    Anywhere
55215/tcp (v6)             ALLOW IN    Anywhere (v6)
443 (v6)                   ALLOW IN    Anywhere (v6)
désactiver la journalisation
1

sudo ufw logging off
Fail2ban
Installer et configurer Fail2ban + UFW sur Debian 11
1

sudo apt install fail2ban
Configuration /etc/fail2ban/jail.local
1
2
3
4
5
6
7
8
9
10
11
12
13
14
15
16
17
18
19
20
21
22
23
24

[DEFAULT]
# Debian 12 has no log files, just journalctl
backend = systemd
logtarget = SYSTEMD-JOURNAL
bantime = 720m # How long to block an abusive IP
findtime = 120m # Time period to check the connections
maxretry = 3 # Within the above time period, block the abusive IP if the number of the abusive IP connections reaches the maxretry
banaction = ufw
banaction_allports = ufw
destemail = rnmkcy@rnmkcy.eu
sender = rnmkcy@rnmkcy.eu
ignoreip = 127.0.0.1/8 ::1 192.168.0.0/24 # Ignore these IP, Hosts, IP ranges during operation

[sshd]
# To use more aggressive sshd modes set filter parameter "mode" in jail.local:
# normal (default), ddos, extra or aggressive (combines all).
# See "tests/files/logs/sshd" or "filter.d/sshd.conf" for usage example and details.
#mode   = normal
enabled = true
port    = 55215
logpath = %(sshd_log)s
backend = %(sshd_backend)s
bantime = 60h
maxretry = 3
Relancer
1

sudo systemctl restart fail2ban
Tester fail2ban
Using Fail2Ban for SSH Brute-force Protection
Depuis un VPS, on va essayer de se connecter sur rnmkcy.eu via ssh
1
2
3
4
5
6
7
8

yann@xoyaz:~$ ssh riri@rnmkcy.eu -p 55215
riri@rnmkcy.eu: Permission denied (publickey).
yann@xoyaz:~$ ssh riri@rnmkcy.eu -p 55215
riri@rnmkcy.eu: Permission denied (publickey).
yann@xoyaz:~$ ssh riri@rnmkcy.eu -p 55215
riri@rnmkcy.eu: Permission denied (publickey).
yann@xoyaz:~$ ssh riri@rnmkcy.eu -p 55215
ssh: connect to host rnmkcy.eu port 55215: Connection refused
Comme vous pouvez le voir dans la sortie ci-dessus, après trois échecs consécutifs, Fail2Ban bloque activement la connexion SSH. Après trois échecs consécutifs, la connexion est interrompue et l’utilisateur est bloqué pendant la durée spécifiée. Si vous essayez de vous connecter à nouveau pendant la période de blocage, vous obtenez une erreur “Connexion refusée” et vous n’êtes pas en mesure d’établir une connexion SSH au serveur.
Pour afficher l’état et les informations concernant une prison particulière comme sshd, vous pouvez utiliser la commande suivante
1

sudo fail2ban-client status sshd
1
2
3
4
5
6
7
8
9

Status for the jail: sshd
|- Filter
|  |- Currently failed:	0
|  |- Total failed:	3
|  `- Journal matches:	_SYSTEMD_UNIT=sshd.service + _COMM=sshd
`- Actions
   |- Currently banned:	4
   |- Total banned:	4
   `- Banned IP list:	109.123.254.249 2a02:7b40:c3b5:f29c::1 2a02:c206:2108:3749::1 195.181.242.156
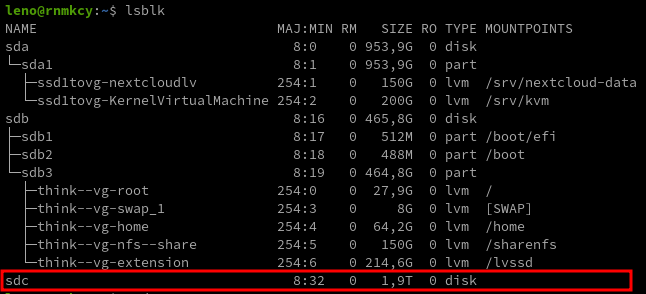
Ajout disque SSD
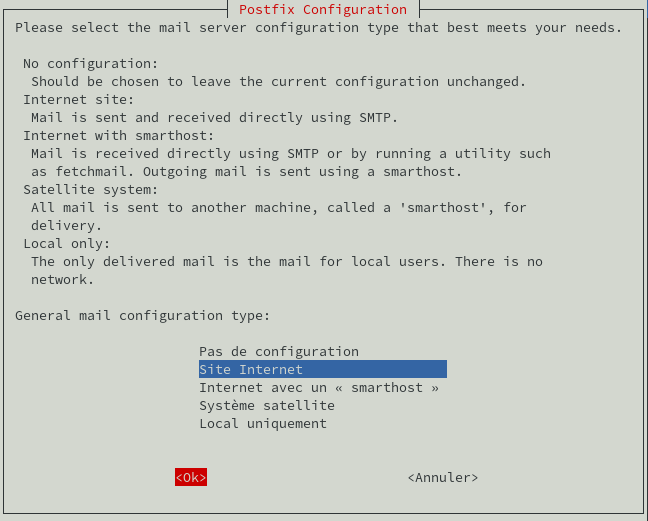
Envoi message via postfix
NE PAS UTILISER CETTE SOLUTION SI UN SERVEUR DE MESSAGERIE DOIT ETRE INSTALLE
![]()
On va configurer Postfix afin qu’il puisse être utilisé pour envoyer des notifications par e-mail uniquement par les applications locales installées sur le même serveur que Postfix
Installer mailutils sudo apt install mailutils
et postfix sudo apt install postfix
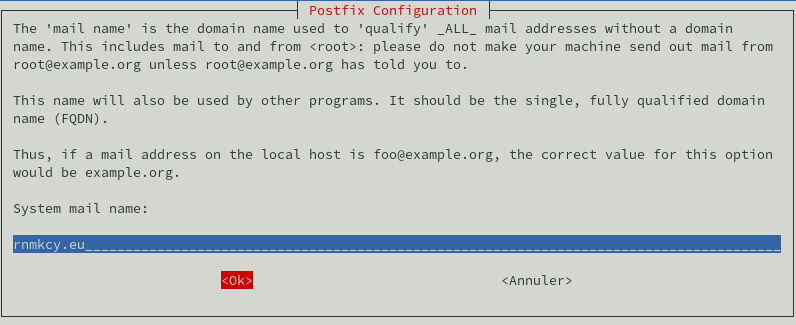
Les modifications dans le fichier /etc/postfix/main.cf
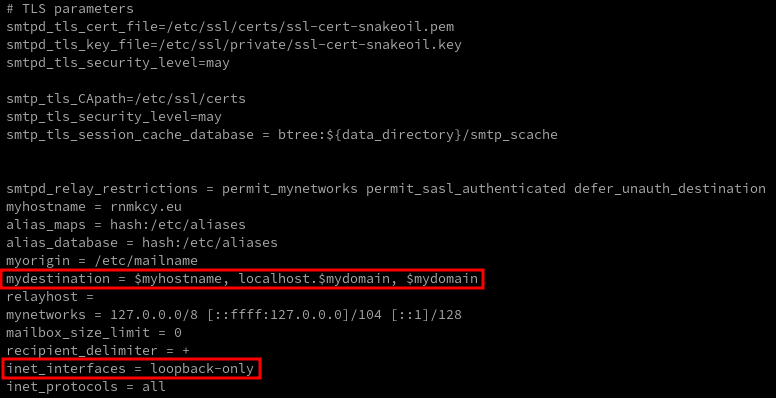
redémarrez Postfix.
1

sudo systemctl restart postfix
Test
1

echo "Test envoi via postfix smtp" | mail -s "serveur debian 12" leno@yanfi.net
Historique ligne de commande
Ajoutez la recherche d’historique de la ligne de commande au terminal
Se connecter en utilisateur debian
Tapez un début de commande précédent, puis utilisez shift + up (flèche haut) pour rechercher l’historique filtré avec le début de la commande.
1
2
3

# Global, tout utilisateur
echo '"\e[1;2A": history-search-backward' | sudo tee -a /etc/inputrc
echo '"\e[1;2B": history-search-forward' | sudo tee -a /etc/inputrc
Erreurs
Les erreurs dans le journal de boot
Montage CIFS
Erreur relevée
1
2
3

oct. 09 16:27:12 rnmkcy.eu kernel: CIFS: VFS: Error connecting to socket. Aborting operation.
oct. 09 16:27:12 rnmkcy.eu kernel: CIFS: VFS: cifs_mount failed w/return code = -111
oct. 09 16:27:12 rnmkcy.eu systemd[1]: Failed to mount mnt-FreeUSB2To.mount - cifs mount script.
Il faut remplacer allow-hotplug eno1 par auto eno1 pour le réseau dans le fichier /etc/network/interfaces
DNS et Certificats
![]()
Domaine rnmkcy.eu
$TTL 3600
@	IN SOA dns110.ovh.net. tech.ovh.net. (2023112301 86400 3600 3600000 300)
         IN NS     ns110.ovh.net.
         IN NS     dns110.ovh.net.
         IN A      82.64.18.243
         IN AAAA   2a01:e0a:9c8:2080:64de:1eff:fe0e:f3eb
         IN CAA    128 issue "letsencrypt.org"
*        IN A      82.64.18.243
*        IN AAAA   2a01:e0a:9c8:2080:64de:1eff:fe0e:f3eb
Valider la DMZ sur la freebox

Domaine ouestline.xyz
$TTL 3600
@	IN SOA dns111.ovh.net. tech.ovh.net. (2024022709 86400 3600 3600000 300)
        IN NS     ns111.ovh.net.
        IN NS     dns111.ovh.net.
        IN AAAA   2a01:e0a:9c8:2080:64de:1eff:fe0e:f3eb
        IN A      82.64.18.243
*        IN AAAA  2a01:e0a:9c8:2080:64de:1eff:fe0e:f3eb
*        IN A     82.64.18.243
Certificats Let’s Encrypt
Les dossiers
1
2

sudo mkdir -p /etc/ssl/private/
sudo chown $USER -R /etc/ssl/private/
Installer acme
1
2
3
4
5
6
7

cd ~
sudo apt install socat -y # prérequis
#git clone https://github.com/Neilpang/acme.sh.git
git clone https://github.com/acmesh-official/acme.sh.git
cd acme.sh
./acme.sh --install
# déconnexion et reconnexion utilisateur
La création des certificats pour le domaine rnmkcy.eu Exporter les clés OVH
1

acme.sh --dns dns_ovh --server letsencrypt --issue --keylength ec-384 -d 'rnmkcy.eu' -d '*.rnmkcy.eu'
L’installation dans les dossiers locaux
1

acme.sh --ecc --install-cert -d rnmkcy.eu --key-file /etc/ssl/private/rnmkcy.eu-key.pem --fullchain-file /etc/ssl/private/rnmkcy.eu-fullchain.pem
La création des certificats pour le domaine ouestline.xyz Exporter les clés OVH
1

acme.sh --dns dns_ovh --server letsencrypt --issue --keylength ec-384 -d 'ouestline.xyz' -d '*.ouestline.xyz'
L’installation dans les dossiers locaux
1
2


acme.sh --ecc --install-cert -d ouestline.xyz --key-file /etc/ssl/private/ouestline.xyz-key.pem --fullchain-file /etc/ssl/private/ouestline.xyz-fullchain.pem
ACL - Multimedia
Installation acl
1

sudo apt install acl
Création groupe et dossier multimedia
1
2
3
4
5
6
7
8
9
10
11
12
13
14
15
16
17
18
19
20
21
22
23

# Script de création des dossiers multimédia

GROUPE_MEDIA=multimedia
DOSSIER_MEDIA=/sharenfs/multimedia

## Création du groupe multimedia
sudo groupadd -f $GROUPE_MEDIA

## Création des dossiers génériques
sudo mkdir -p "$DOSSIER_MEDIA"
sudo mkdir -p "$DOSSIER_MEDIA/Music"
sudo mkdir -p "$DOSSIER_MEDIA/Picture"
sudo mkdir -p "$DOSSIER_MEDIA/Video"
sudo mkdir -p "$DOSSIER_MEDIA/eBook"
sudo mkdir -p "$DOSSIER_MEDIA/Divers"

## Application des droits étendus sur le dossier multimedia.
# Droit d'écriture pour le groupe et le groupe multimedia en acl et droit de lecture pour other:
sudo setfacl -RnL -m g:$GROUPE_MEDIA:rwX,g::rwX,o:r-X "$DOSSIER_MEDIA"
# Application de la même règle que précédemment, mais par défaut pour les nouveaux fichiers.
sudo setfacl -RnL -m d:g:$GROUPE_MEDIA:rwX,g::rwX,o:r-X "$DOSSIER_MEDIA"
# Réglage du masque par défaut. Qui garantie (en principe...) un droit maximal à rwx. Donc pas de restriction de droits par l'acl.
sudo setfacl -RL -m m::rwx "$DOSSIER_MEDIA"
Ajout utilisateurs + nextcloud au groupe multimedia
1
2
3

sudo usermod -a -G multimedia leno
sudo usermod -a -G multimedia yann
sudo usermod -a -G multimedia nextcloud
Les droits
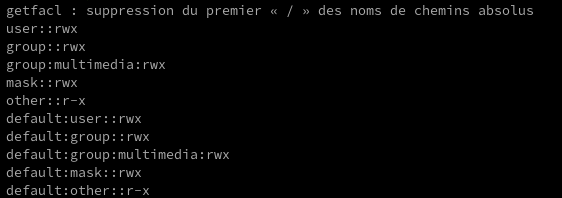
1

getfacl --omit-header /sharenfs/multimedia/
1
2
3
4
5
6
7
8
9
10
11

getfacl : suppression du premier « / » des noms de chemins absolus
user::rwx
group::rwx
group:multimedia:rwx
mask::rwx
other::r-x
default:user::rwx
default:group::rwx
default:group:multimedia:rwx
default:mask::rwx
default:other::r-x
Partages
Samba FreeUSB2To (Freebox)
Partage disque USB 2To monté sur FreeboX
Résumé
Partage : //192.168.0.254/FreeUSB2To
Point de montage local : sudo mkdir -p /mnt/FreeUSB2To
Outil cifs : sudo apt install cifs-utils
Utlisateur mot de passe: /root/.smbcredentials
Deux options de montage, via fstab ou systemd.mount
A-Montage via fstab (Défaut)
Ajout de la ligne suivante au fichier /etc/fstab
1

//192.168.0.254/FreeUSB2To /mnt/FreeUSB2To cifs _netdev,x-systemd.after=network-online.target,noexec,nosuid,vers=3.0,uid=1000,gid=1000,credentials=/root/.smbcredentials 0 0
Recharger
1
2

sudo systemctl daemon-reload
sudo mount -a
B-Montage avec systemd automount, /etc/systemd/system/mnt-FreeUSB2To.mount
1
2
3
4
5
6
7
8
9
10
11
12
13

[Unit]
  Description=cifs mount script
  Requires=network-online.target
  After=network-online.service

[Mount]
  What=//192.168.0.254/FreeUSB2To
  Where=/mnt/FreeUSB2To
  Options=credentials=/root/.smbcredentials,rw,uid=1000,gid=1000,vers=3.0
  Type=cifs

[Install]
  WantedBy=multi-user.target
/etc/systemd/system/mnt-FreeUSB2To.automount
1
2
3
4
5
6
7
8
9
10
11

[Unit]
  Description=cifs mount script
  Requires=network-online.target
  After=network-online.service

[Automount]
  Where=/mnt/FreeUSB2To
  TimeoutIdleSec=10

[Install]
  WantedBy=multi-user.target
Lancement et activation
1

sudo systemctl enable mnt-FreeUSB2To.automount --now
Vérifier : ls /mnt/FreeUSB2To/
Lien
1

ln -s /mnt/FreeUSB2To/ /home/leno/FreeUSB2To
nfs-ssd
Créer un volume logique LVM de 300G EXT4 sur ssd1tovg
1
2

sudo lvcreate -L 300G -n nfs-ssd ssd1tovg
sudo mkfs.ext4 /dev/ssd1tovg/nfs-ssd
Relever UUID : sudo blkid |grep "nfs--ssd"
UUID=”dceb7362-f0e1-480d-92ba-2078b9938208”
Point de montage et droits utilisateur ID=1000
1
2

sudo mkdir -p /mnt/nfs-ssd
sudo chown -R $USER:$USER -R /mnt/nfs-ssd
Ajout au fichier /etc/fstab
1
2

#  /dev/mapper/ssd1tovg-nfs--ssd
UUID=dceb7362-f0e1-480d-92ba-2078b9938208 /mnt/nfs-ssd ext4    defaults        0       2
Recharger et monter
1
2

sudo systemctl daemon-reload
sudo mount -a
NFS sharenfs
NFS (Network File System), partages réseau linux
Liens
1
2

ln -s /sharenfs/ /home/leno/sharenfs
ln -s /sharenfs/scripts/ /home/leno/scripts
Ajout au serveur NFS d’un partage de 300Go
Ajouter les systèmes de fichiers dans le fichier d’exportation /etc/exports du serveur NFS afin de déterminer les systèmes de fichiers locaux exportés vers les clients NFS.
Le fichier comporte des commentaires indiquant la structure générale de chaque ligne de configuration. La syntaxe est la suivante :
directory_to_share client(share_option1,...,share_optionN)
Ouvrir le fichier d’exportation avec votre éditeur de texte
1

sudo nano /etc/exports
Ajouter la ligne suivante au contenu existant
1

/mnt/nfs-ssd 192.168.0.0/24(rw,sync,no_all_squash,root_squash,no_subtree_check)
Vous devrez créer une ligne pour chacun des répertoires que vous prévoyez de partager.
Le fichier au 11 octobre 2024
1
2

/sharenfs   192.168.0.0/24(rw,no_root_squash,no_subtree_check)
/mnt/nfs-ssd 192.168.0.0/24(rw,sync,no_all_squash,root_squash,no_subtree_check)
Exportation
1

sudo exportfs -arv
Avec le résultat suivant
1
2

exporting 192.168.0.0/24:/mnt/nfs-ssd
exporting 192.168.0.0/24:/sharenfs
Lien
1

ln -s /mnt/nfs-ssd/ /home/leno/nfs-ssd
Stockage 2To USB3toNvme (NEW)
Stockage USB3-Nvme 2To ext4 Le SSD Nvme 2To est connecté USB 3 sur /dev/sdd
Créer un point de montage
1

sudo mkdir -p /mnt/USB3toNvme
Relever UUID : sudo blkid |grep sdd
1

/dev/sdd1: UUID="0afcbea4-38cb-4d00-bcc7-57a8531f8dd8" BLOCK_SIZE="4096" TYPE="ext4" PARTLABEL="Linux filesystem" PARTUUID="5a6aac94-b9b6-4793-bd68-fd9e56b9adb3"
Il faut garder à l’esprit que cette procédure ne fonctionne que pour les clés USB connectées au système au démarrage.
La méthode recommandée et la plus fiable consiste à utiliser l’identifiant universel unique (UUID) . L’UUID est généralement un numéro de 128 bits utilisé pour identifier de manière unique les disques afin que le noyau les mappe à l’emplacement exact du nœud.
- Nous devons spécifier que nous utilisons l’UUID dans le fichier
/etc/fstab:
UUID=0afcbea4-38cb-4d00-bcc7-57a8531f8dd8 /mnt/USB3toNvme auto defaults,nofail,x-systemd.automount 0 2 -
Le deuxième élément de la commande est le point de montage
/mnt/USB3toNvme - Si nous le savons, nous pouvons spécifier le type du système de fichiers dans le troisième élément (par exemple FAT32 ou exFAT). Cependant, si nous ne le savons pas, nous pouvons toujours utiliser l’ option auto
-
Le quatrième élément est la liste des options . Nous spécifions celles par défaut suivies de nofail (utilisé pour éviter de signaler des échecs) et
x-system.automount(dont nous avons besoin pour demander à systemd de monter automatiquement le périphérique). Nous pouvons spécifier d’autres options si nous le souhaitons, à l’exception de noauto , qui empêche le montage automatique du lecteur. - Le cinquième élément indique si nous souhaitons effectuer une vérification pour vider les fichiers. Il est généralement défini sur 0 pour ne pas l’effectuer.
- Le sixième élément est l’ordre dans lequel le noyau vérifie les systèmes de fichiers au démarrage . Pour les périphériques root, la valeur est 1 mais pour notre clé USB, elle devrait être 2 .
Recharger et monter
1
2

sudo systemctl daemon-reload
sudo mount /dev/sdd1 /mnt/USB3toNvme
Stockage 2To USB3toNvme (OLD)
Stockage USB3-Nvme 2To ext4 Le SSD Nvme 2To est connecté USB 3 sur /dev/sdc
En mode su
Le nouveau SSD Nvme 2To est connecté USB 3 sur /dev/sdc
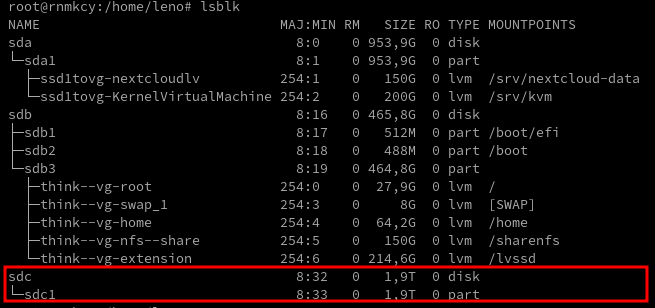
Créer les nouvelles partitions
1

gdisk /dev/sdc
1
2
3
4
5
6
7
8
9
10
11
12
13
14
15
16
17
18
19
20
21
22
23
24
25
26

GPT fdisk (gdisk) version 1.0.9

Partition table scan:
  MBR: not present
  BSD: not present
  APM: not present
  GPT: not present

Creating new GPT entries in memory.

Command (? for help): n
Partition number (1-128, default 1):
First sector (34-4000797326, default = 2048) or {+-}size{KMGTP}:
Last sector (2048-4000797326, default = 4000796671) or {+-}size{KMGTP}:
Current type is 8300 (Linux filesystem)
Hex code or GUID (L to show codes, Enter = 8300):
Changed type of partition to 'Linux filesystem'

Command (? for help): w

Final checks complete. About to write GPT data. THIS WILL OVERWRITE EXISTING
PARTITIONS!!

Do you want to proceed? (Y/N): Y
OK; writing new GUID partition table (GPT) to /dev/sdc.
The operation has completed successfully.
Vérification
Formater la partition ext4
1

mkfs.ext4 /dev/sdc1
UUID partition /dev/sdc1
1

blkid |grep "/dev/sdc1"
Résultat commande
1

/dev/sdc1: UUID="0afcbea4-38cb-4d00-bcc7-57a8531f8dd8" BLOCK_SIZE="4096" TYPE="ext4" PARTLABEL="Linux filesystem" PARTUUID="5a6aac94-b9b6-4793-bd68-fd9e56b9adb3"
Création point de montage
1

mkdir /mnt/USB3toNvme
Fstab
1
2

# USB3toNvme 2To ext4
UUID=0afcbea4-38cb-4d00-bcc7-57a8531f8dd8 /mnt/USB3toNvme      ext4    defaults        0       2
Montage
1
2

systemctl daemon-reload
mount -a
Vérification
1

df -h /mnt/USB3toNvme/

Droits utilisateur leno
1

sudo chown $USER:$USER -R /mnt/USB3toNvme
Lien
1

sudo ln -s /mnt/USB3toNvme $HOME/USB3toNvme
ACL USB3toNvme
Accès au dossier /mnt/USB3toNvme controlé par acl et le groupe multimedia
1
2
3
4
5
6
7
8
9
10
11
12
13
14
15
16
17
18

# Script de création des dossiers multimédia

GROUPE_MEDIA=multimedia
DOSSIER_MEDIA=/mnt/USB3toNvme

## Création du groupe multimedia
#sudo groupadd -f $GROUPE_MEDIA

## Création des dossiers génériques
sudo mkdir -p "$DOSSIER_MEDIA"

## Application des droits étendus sur le dossier multimedia.
# Droit d'écriture pour le groupe et le groupe multimedia en acl et droit de lecture pour other:
sudo setfacl -RnL -m g:$GROUPE_MEDIA:rwX,g::rwX,o:r-X "$DOSSIER_MEDIA"
# Application de la même règle que précédemment, mais par défaut pour les nouveaux fichiers.
sudo setfacl -RnL -m d:g:$GROUPE_MEDIA:rwX,g::rwX,o:r-X "$DOSSIER_MEDIA"
# Réglage du masque par défaut. Qui garantie (en principe...) un droit maximal à rwx. Donc pas de restriction de droits par l'acl.
sudo setfacl -RL -m m::rwx "$DOSSIER_MEDIA"
Les droits
1

getfacl --omit-header /mnt/USB3toNvme
Serveur de messagerie
maddy
Arrêter et désactiver postfix (si installé)
1

sudo systemctl stop postfix && sudo systemctl disable postfix
Suivre la procédure détaillée dans ce lien Maddy Mail Server rnmkcy.eu
Le serveur de messagerie Maddy est configuré avec la gestion des utilisateurs par LLDAP
Le fichier de configuration : $HOME/.msmtprc
1
2
3
4
5
6
7
8

account yann_rnmkcy_eu
host mx1.rnmkcy.eu
port 587
from yann@rnmkcy.eu
user yann@rnmkcy.eu
password Mot_de_Passe_yann
#
account default : postmaster_maddy
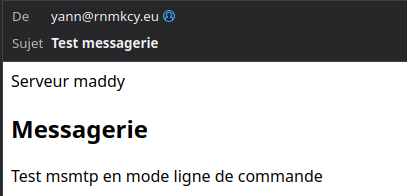
Envoi message en ligne de commande via msmtp
1
2
3

echo -e "Subject: Test messagerie\r\nMIME-Version: 1.0\nContent-Type: text/; charset=utf-8\r\n\r\n \
/><head>Serveur maddy </head><body> \
<h2>Messagerie</h2><p>Test msmtp en mode ligne de commande </p></body>" |msmtp --from=yann@rnmkcy.eu -t yanfi@yanfi.net
Smtp acme
Définir les paramètres dns acme pour une notification par smtp dans ./bashrc
1
2
3
4
5
6
7
8

export SMTP_FROM="postmaster@rnmkcy.eu"
export SMTP_TO="vpn@cinay.eu"
export SMTP_HOST="rnmkcy.eu"
export SMTP_PORT="587"
export SMTP_SECURE="tls"
export SMTP_USERNAME="postmaster@rnmkcy.eu"
export SMTP_PASSWORD="xxxxxxxxxxxxxxx"
export SMTP_BIN="/usr/bin/python3"
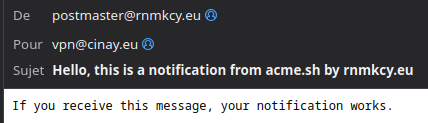
exécutez la commande suivante pour activer la notification smtp pour votre Let’s Encrypt lorsqu’un certificat est ignoré, renouvelé ou erroné. Par exemple :
1

acme.sh --set-notify --notify-hook smtp
Résultat de la commande
1
2
3

[mar. 26 déc. 2023 14:46:06 CET] Set notify hook to: smtp
[mar. 26 déc. 2023 14:46:06 CET] Sending via: smtp
[mar. 26 déc. 2023 14:46:06 CET] smtp Success
Modifier le script echeance_certificat.sh pour y inclure les paramètres --set-notify --notify-hook smtp
Nextcloud
![]()
Installer nextcloud hub
Nginx PHP MariaDB Nextcloud Hub
Gestion Mail
Mail Nextcloud
Si vous avez installé un serveur mail, installer at activer l’application mail de nextcloud

Paramétrage en “Manuel”
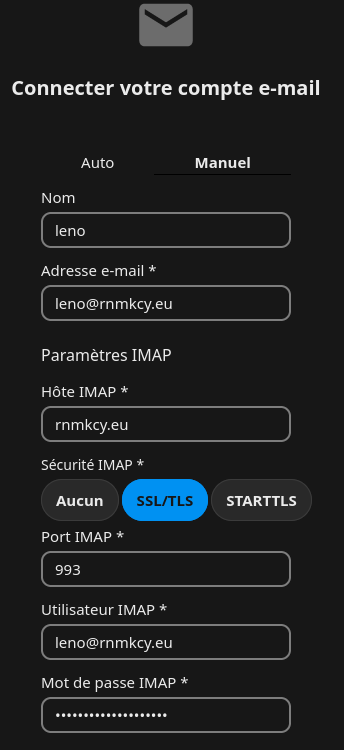
ATTENTION : Hôtes IMAP et SMTP --> mx1.rnmkcy.eu
Cliquer sur “Connecter”

SnappyMail Nextcloud (INACTIF)
Fail2ban Nextcloud
Hardening and security guidance
L’exposition de votre serveur à l’internet conduira inévitablement à l’exposition des services fonctionnant sur les ports exposés à l’internet à des tentatives de connexion par force brute.
Configurer un filtre et une prison pour Nextcloud
Un filtre définit des règles regex pour identifier les utilisateurs qui ne parviennent pas à s’authentifier sur l’interface utilisateur de Nextcloud, WebDAV, ou qui utilisent un domaine non fiable pour accéder au serveur.
Créer un fichier /etc/fail2ban/filter.d/nextcloud.conf avec le contenu suivant :
[Definition]
_groupsre = (?:(?:,?\s“\w+”:(?:”[^”]+”|\w+)))
failregex = ^{%(_groupsre)s,?\s*“remoteAddr”:”
Le fichier jail définit la manière de traiter les tentatives d’authentification échouées détectées par le filtre Nextcloud.
Créez un fichier /etc/fail2ban/jail.d/nextcloud.local avec le contenu suivant :
1
2
3
4
5
6
7
8
9
10

[nextcloud]
backend = auto
enabled = true
port = 80,443
protocol = tcp
filter = nextcloud
maxretry = 3
bantime = 86400
findtime = 43200
logpath = /srv/nextcloud-data/nextcloud.log
Veillez à remplacer logpath par l’emplacement nextcloud.log de votre installation. Si vous utilisez des ports autres que 80 et 443 pour votre serveur Web, vous devez également les remplacer. Les paramètres bantime et findtime sont définis en secondes.
Redémarrez le service fail2ban.
1

sudo systemctl restart fail2ban
Vous pouvez vérifier l’état de votre prison Nextcloud en exécutant :
1

sudo fail2ban-client status nextcloud
Etat relevé
1
2
3
4
5
6
7
8
9

Status for the jail: nextcloud
|- Filter
|  |- Currently failed:	0
|  |- Total failed:	0
|  `- File list:	/srv/nextcloud-data/nextcloud.log
`- Actions
   |- Currently banned:	0
   |- Total banned:	0
   `- Banned IP list:
Partages Webdav (davfs2)
davfs2 est un outil Linux permettant de se connecter à des partages WebDAV comme s’il s’agissait de disques locaux. Il s’agit d’un système de fichiers open-source sous licence GPL pour le montage de serveurs WebDAV.
Vous pouvez créer un point de montage WebDAV en ligne de commande Linux. Ceci est utile si vous préferrez accéder à Nextcloud de la même manière que n’importe quel autre système de ficher distant. L’exemple suivant montre comment créer un point de montage personnel et activer sa connexion automatiquement à chaque fois que vous vous connectez à votre ordinateur Linux.
Installer le driver WebDAV davfs2, qui autorise le montage de partages WebDAV comme n’importe quel autre filesystem distant. Utilisez cette commande pour l’installer sur Debian/Ubuntu
1

sudo apt install davfs2
Ajoutez vous dans le groupe davfs2
1

sudo usermod -aG davfs2 $USER
Créez ensuite un répertoire nextcloud dans votre répertoire personnel pour le point de montage, et .davfs2/ pour votre fichier de configuration personnel
1
2

mkdir ~/nextcloud
mkdir ~/.davfs2
Copiez /etc/davfs2/secrets dans ~/.davfs2
1

sudo cp  /etc/davfs2/secrets ~/.davfs2/secrets
Mettez vous propriétaire avec les permissions read-write seulement
1
2

sudo chown $USER:$USER ~/.davfs2/secrets
chmod 600 ~/.davfs2/secrets
Ajoutez vos information de connexion Nextcloud à la fin du fichier secrets ~/.davfs2/secrets, en mettant :
- Le point de montage : /home/leno/nextcloud
- identifiant : yann
- mot de passe de votre compte Nextcloud : Mot de passe application ‘Webdav davfs2’
Le fichier ~/.davfs2/secrets
1
2
3
4
5
6

# Credential Line
# ---------------
# A credential line consists of the mount-point, the user-name and
# the password. The mount-point must be an absolute path, starting
# with /. The password may be omitted.
/home/leno/nextcloud yann mot_passe_application_nextcloud
ATTENTION ,il faut créer un mot de passe application pour l'utilisateur yann dans nextcloud
Ajouter l’information de montage dans /etc/fstab avec l’url d’accès aux dossiers de l’utilisateur yann –> https://cloud.rnmkcy.eu/remote.php/dav/files/5afdc712-b11f-305a-948f-195fa036d5a5/
Ligne ajoutée en fin du fichier /etc/fstab
1

https://cloud.rnmkcy.eu/remote.php/dav/files/5afdc712-b11f-305a-948f-195fa036d5a5/ /home/leno/nextcloud davfs user,rw,auto 0 0
Recharger
1

sudo systemctl daemon-reload
Ensuite testez le montage et l’authentification en exécutant la commande suivante. Si votre configuration est correcte, vous n’avez pas besoin de passer en mode root
1

mount ~/nextcloud
Si vous rencontrez des problèmes lorsque vous créer un fichier dans le répertoire, éditez le fichier /etc/davfs2/davfs2.conf et ajoutez
1

use_locks 0
Vous devriez aussi être capable de le démonter
1

umount ~/nextcloud
Maintenant, chaque fois que vous vous connecterez à votre système Linux, votre partage Nextcloud devrait automatiquement se connecter via WebDAV dans votre répertoire ~/nextcloud . Si vous préférez le monter manuellement, remplacez auto par noauto dans /etc/fstab
/home/leno/nextcloud est monté avec les droits root
Si l’on veut un montage avec des droits utilisateurs il faut ajouter uid et gid
Ligne modifiée en fin du fichier /etc/fstab
1
2

# uid=1000(leno) gid=1000(leno)
https://cloud.rnmkcy.eu/remote.php/dav/files/5afdc712-b11f-305a-948f-195fa036d5a5/ /home/leno/nextcloud davfs user,uid=1000,gid=1000,rw,auto 0 0
Stockage externe (OPTION)
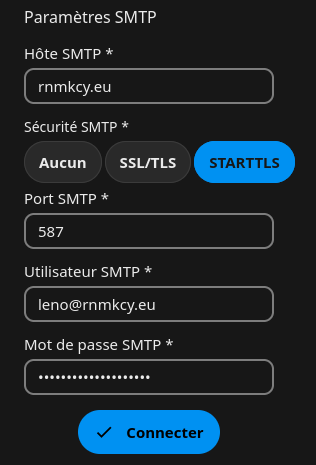
KB450312 – Connecting SMB Share to Nextcloud
Installer le client samba
1

sudo apt install smbclient
Activer application External storage support

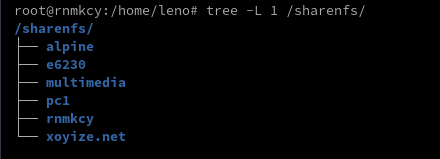
Accès thinkshare ,disque local /sharenfs au groupe admin seulement

Accès FreeUSB2To sous-dossier Externe_Nextcloud ,disque samba connecté sur la freebox
Quand on sélectionne le dossier Home, le readme.md est affiché et on peut le modifier ou le supprimer
Sauvegarde Restauration
Scripts Bash Sauvegarde-Restauration Nextcloud
Le fichier de configuration ~/Nextcloud-Backup-Restore
Etendre Réduire
# Configuration for Nextcloud-Backup-Restore scripts

# TODO: The main backup directory
backupMainDir='/mnt/FreeUSB2To/sauvegardes/nextcloud_backup'

# TODO: Use compression for file/data dir
# When this is the only script for backups, it is recommend to enable compression.
# If the output of this script is used in another (compressing) backup (e.g. borg backup),
# you should probably disable compression here and only enable compression of your main backup script.
useCompression=false

# TOOD: The bare tar command for using compression while backup.
# Use 'tar -cpzf' if you want to use gzip compression.
compressionCommand='tar -cpzf'

# TOOD: The bare tar command for using compression while restoring.
# Use 'tar -xmpzf' if you want to use gzip compression.
extractCommand='tar -xmpzf'

# TODO: File names for backup files
fileNameBackupFileDir='nextcloud-filedir.tar'
fileNameBackupDataDir='nextcloud-datadir.tar'
fileNameBackupExternalDataDir=''
fileNameBackupDb='nextcloud-db.sql'

# TODO: The directory of your Nextcloud installation (this is a directory under your web root)
nextcloudFileDir='/var/www/nextcloud'

# The directory of your Nextcloud data directory (outside the Nextcloud file directory)
# If your data directory is located under Nextcloud's file directory (somewhere in the web root),
# the data directory will not be a separate part of the backup but included in the file directory backup.
nextcloudDataDir='/srv/nextcloud-data'

# TODO: The directory of your Nextcloud's local external storage.
# Uncomment if you use local external storage.
#nextcloudLocalExternalDataDir='/var/nextcloud_external_data'

# TODO: The service name of the web server. Used to start/stop web server (e.g. 'systemctl start <webserverServiceName>')
webserverServiceName='nginx'

# TODO: Your web server user
webserverUser='nextcloud'

# TODO: The name of the database system (one of: mysql, mariadb, postgresql)
# 'mysql' and 'mariadb' are equivalent, so when using 'mariadb', you could also set this variable to 'mysql' and vice versa.
databaseSystem='mysql'

# TODO: Your Nextcloud database name
nextcloudDatabase='nextcloud'

# TODO: Your Nextcloud database user
dbUser='nextcloud'

# TODO: The password of the Nextcloud database user
dbPassword='Mot_passe_base_mysql_nextcloud'

# TODO: The maximum number of backups to keep (when set to 0, all backups are kept)
maxNrOfBackups=5

# TODO: Setting to include/exclude the backup directory of the Nextcloud updater
# Set to true in order to include the backups of the Nextcloud updater
includeUpdaterBackups=false

# OPTIONAL: Setting to include/exclude the Nextcloud data directory
# Set to false to exclude the Nextcloud data directory from backup
# WARNING: Excluding the data directory is NOT RECOMMENDED as it leaves the backup in an inconsistent state and may result in data loss!
includeNextcloudDataDir=true
rnmkcy.eu
Nginx, PHP et MariaDB ont été installés lors de la mise en place de Nextcloud
Dossier racine (rnmkcy.eu)
Création sur le disque partagé
1

mkdir -p /sharenfs/multimedia/Divers/{diceware,img,osm-new,site,static}
Les droits
1
2

sudo chown leno:leno -R /sharenfs/multimedia/
sudo chmod 775 -R /sharenfs/multimedia/
La topologie
Déplacer le root du site rnmkcy.eu
Création dossier : mkdir /sharenfs/rnmkcy
Déplacement : sudo mv /var/www/default-www /sharenfs/rnmkcy/racine/
Le fichier nginx /etc/nginx/conf.d/rnmkcy.eu.conf
1
2
3
4
5
6
7
8
9
10
11
12
13
14
15
16
17
18
19
20
21
22
23
24
25
26
27

server {
    listen 443 ssl http2;
    listen [::]:443 ssl http2;
    server_name rnmkcy.eu;

    include /etc/nginx/conf.d/security.conf.inc;

    root /sharenfs/rnmkcy/racine/ ;
        location / {
            index index.htm index/ index.php;
        }
  location ~ \.php(?:$|/) {
    include fastcgi_params;
    fastcgi_param SCRIPT_FILENAME $request_filename;
    fastcgi_split_path_info ^(.+\.php)(/.+)$;
    fastcgi_param HTTPS on;

    fastcgi_param modHeadersAvailable true;         # Avoid sending the security headers twice
    fastcgi_param front_controller_active true;     # Enable pretty urls
    fastcgi_param HTTP_ACCEPT_ENCODING "";          # Disable encoding of nextcloud response to inject ynh scripts
    fastcgi_pass unix:/var/run/php/php8.3-fpm.sock;
    fastcgi_intercept_errors on;
    fastcgi_request_buffering off;
  }

  include /etc/nginx/conf.d/rnmkcy.eu.d/*.conf;
}
Recharger : sudo systemctl reload nginx
static site diceware et cartes (static.rnmkcy.eu)
Regroupe static site diceware et cartes
1

/etc/nginx/conf.d/static.rnmkcy.eu.conf
1
2
3
4
5
6
7
8
9
10
11
12
13
14
15
16
17
18
19
20
21
22
23
24
25
26
27
28
29
30
31
32
33
34
35
36
37
38
39
40
41
42
43
44
45
46
47
48
49
50
51
52
53
54
55
56
57
58
59
60
61
62
63
64
65
66
67
68
69
70
71
72
73
74
75
76
77
78
79
80
81
82
83
84
85
86
87
88
89
90

server {
    listen 443 ssl http2;
    listen [::]:443 ssl http2;
    server_name static.rnmkcy.eu;

    include /etc/nginx/conf.d/security.conf.inc;
    root /sharenfs/multimedia/Divers/static/;

    location / {
      index index.htm index/ index.php;
		  location ~ \.php(?:$|/) {
		    include fastcgi_params;
		    fastcgi_param SCRIPT_FILENAME $request_filename;
		    fastcgi_split_path_info ^(.+\.php)(/.+)$;
		    fastcgi_param HTTPS on;

		    fastcgi_param modHeadersAvailable true;         # Avoid sending the security headers twice
		    fastcgi_param front_controller_active true;     # Enable pretty urls
		    fastcgi_param HTTP_ACCEPT_ENCODING "";          # Disable encoding of nextcloud response to inject ynh scripts
		    fastcgi_pass unix:/var/run/php/php8.3-fpm.sock;
		    fastcgi_intercept_errors on;
		    fastcgi_request_buffering off;
		  }
    }
}

server {
    listen 443 ssl http2;
    listen [::]:443 ssl http2;
    server_name site.rnmkcy.eu;

    include /etc/nginx/conf.d/security.conf.inc;
    root /sharenfs/rnmkcy.eu/site/;

    location / {
      index index/ index.php /_h5ai/public/index.php;
		  location ~ \.php(?:$|/) {
		    include fastcgi_params;
		    fastcgi_param SCRIPT_FILENAME $request_filename;
		    fastcgi_split_path_info ^(.+\.php)(/.+)$;
		    fastcgi_param HTTPS on;

		    fastcgi_param modHeadersAvailable true;         # Avoid sending the security headers twice
		    fastcgi_param front_controller_active true;     # Enable pretty urls
		    fastcgi_param HTTP_ACCEPT_ENCODING "";          # Disable encoding of nextcloud response to in>
		    fastcgi_pass unix:/var/run/php/php8.3-fpm.sock;
		    fastcgi_intercept_errors on;
		    fastcgi_request_buffering off;
		  }
	}
}

server {
    listen 443 ssl http2;
    listen [::]:443 ssl http2;
    server_name dice.rnmkcy.eu;

    include /etc/nginx/conf.d/security.conf.inc;
    root /sharenfs/multimedia/Divers/diceware/;

    location / {
      index index.htm index/;
    }
}

server {
    listen 443 ssl http2;
    listen [::]:443 ssl http2;
    server_name osm.rnmkcy.eu;

    include /etc/nginx/conf.d/security.conf.inc;
    root /sharenfs/multimedia/Divers/osm-new/;

    location / {
      index index.htm index/ index.php;
		  location ~ \.php(?:$|/) {
		    include fastcgi_params;
		    fastcgi_param SCRIPT_FILENAME $request_filename;
		    fastcgi_split_path_info ^(.+\.php)(/.+)$;
		    fastcgi_param HTTPS on;

		    fastcgi_param modHeadersAvailable true;         # Avoid sending the security headers twice
		    fastcgi_param front_controller_active true;     # Enable pretty urls
		    fastcgi_param HTTP_ACCEPT_ENCODING "";          # Disable encoding of nextcloud response to inject ynh scripts
		    fastcgi_pass unix:/var/run/php/php8.3-fpm.sock;
		    fastcgi_intercept_errors on;
		    fastcgi_request_buffering off;
		  }
    }
}
Recharger : sudo systemctl reload nginx
Accès
Shaarli (shaarli.rnmkcy.eu)
Shaarli, le service personnel, minimaliste, super rapide, sans base de données, signet.
Installer Shaarli
Pour installer Shaarli, il suffit de placer les fichiers de la dernière archive .zip sous la racine du document de votre serveur web (directement à la racine du document, ou dans un sous-répertoire). Téléchargez l’archive shaarli-vX.X.X-full pour y inclure les dépendances.
1
2
3

wget https://github.com/shaarli/Shaarli/releases/download/v0.13.0/shaarli-v0.13.0-full.zip
unzip shaarli-v0.13.0-full.zip
sudo rsync -avP Shaarli/ /var/www/shaarli.rnmkcy.eu/
Définir les permissions de fichier
Quelle que soit la méthode d’installation, les autorisations de fichiers appropriées doivent être définies:
1
2
3

sudo chown -R root:www-data /var/www/shaarli.rnmkcy.eu
sudo chmod -R g+rX /var/www/shaarli.rnmkcy.eu
sudo chmod -R g+rwX /var/www/shaarli.rnmkcy.eu/{cache/,data/,pagecache/,tmp/}
nginx php-fpm
Installer si nécessaire nginx et php-fpm
1

sudo apt install nginx php-fpm
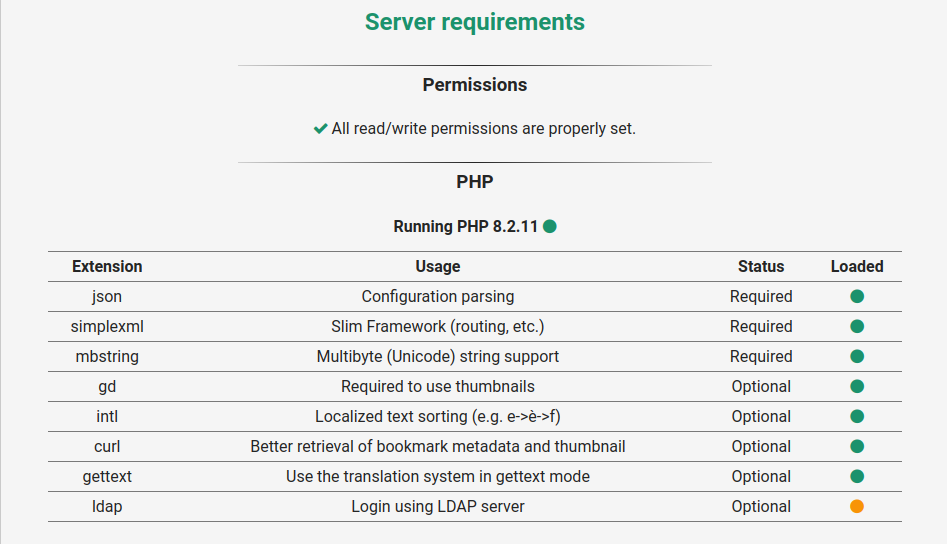
Extensions PHP nécessaires
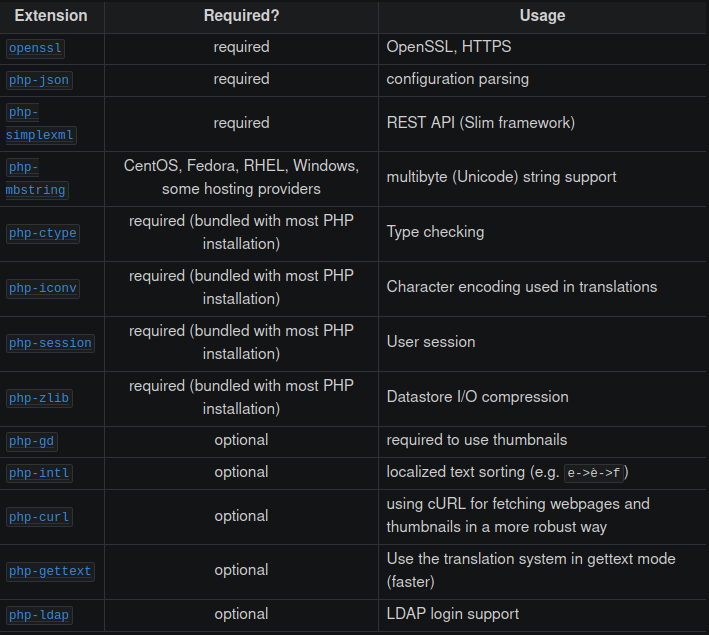
Installer
1

sudo apt install php8.3-xml php8.3-common php8.3-gd php8.3-intl php8.3-curl php8.3-mbstring
Le fichier php fpm /etc/php/8.2/fpm/pool.d/shaarli.conf
1
2
3
4
5
6
7
8
9
10
11
12
13
14
15
16
17
18

[shaarli]

user = www-data
group = www-data

listen = /var/run/php/php8.3-fpm-shaarli.sock

listen.owner = www-data
listen.group = www-data

pm = dynamic
pm.max_children = 5
pm.start_servers = 2
pm.min_spare_servers = 1
pm.max_spare_servers = 3

; Default Value: current directory or / when chroot
chdir = /var/www/shaarli.rnmkcy.eu
Modifier le fichier de configuration de virtualhost
1

sudo nano /etc/nginx/conf.d/shaarli.rnmkcy.eu.conf
1
2
3
4
5
6
7
8
9
10
11
12
13
14
15
16
17
18
19
20
21
22
23
24
25
26
27
28
29
30
31
32
33
34
35
36
37
38
39
40
41
42
43
44
45
46
47
48
49
50
51
52
53
54
55
56
57
58
59
60
61
62
63

server {
    listen 80;
    listen [::]:80;
    server_name  shaarli.rnmkcy.eu;

    # redirect all plain HTTP requests to HTTPS
    return 301 https://shaarli.rnmkcy.eu$request_uri;
}

server {
    # ipv4 listening port/protocol
    listen       443 ssl http2;
    # ipv6 listening port/protocol
    listen           [::]:443 ssl http2;
    server_name  shaarli.rnmkcy.eu;
    root         /var/www/shaarli.rnmkcy.eu;

    # log file locations
    # combined log format prepends the virtualhost/domain name to log entries
    access_log  /var/log/nginx/access.log combined;
    error_log   /var/log/nginx/error.log;

    include /etc/nginx/conf.d/security.conf.inc;

    # increase the maximum file upload size if needed: by default nginx limits file upload to 1MB (413 Entity Too Large error)
    client_max_body_size 100m;

    # relative path to shaarli from the root of the webserver
    # if shaarli is installed in a subdirectory of the main domain, edit the location accordingly
    location / {
        # default index file when no file URI is requested
        index index.php;
        try_files _ /index.php$is_args$args;
    }

    location ~ (index)\.php$ {
        try_files $uri =404;
        # slim API - split URL path into (script_filename, path_info)
        fastcgi_split_path_info ^(.+\.php)(/.+)$;
        # pass PHP requests to PHP-FPM
        fastcgi_pass   unix:/var/run/php/php8.3-fpm-shaarli.sock;
        fastcgi_index  index.php;
        include        fastcgi.conf;
    }

    location ~ /doc// {
        default_type "text/";
        try_files $uri $uri/ $uri/ =404;
    }

    location = /favicon.ico {
        # serve the Shaarli favicon from its custom location
        alias /var/www/shaarli/images/favicon.ico;
    }

    # allow client-side caching of static files
    location ~* \.(?:ico|css|js|gif|jpe?g|png|ttf|oet|woff2?)$ {
        expires    max;
        add_header Cache-Control "public, must-revalidate, proxy-revalidate";
        # HTTP 1.0 compatibility
        add_header Pragma public;
    }
}
Vérifier
1

sudo nginx -t
Recharger les configurations php-fpm nginx
1

sudo systemctl reload php8.3-fpm nginx
Configurer Shaarli
Ouvrir le lien https://shaarli.rnmkcy.eu
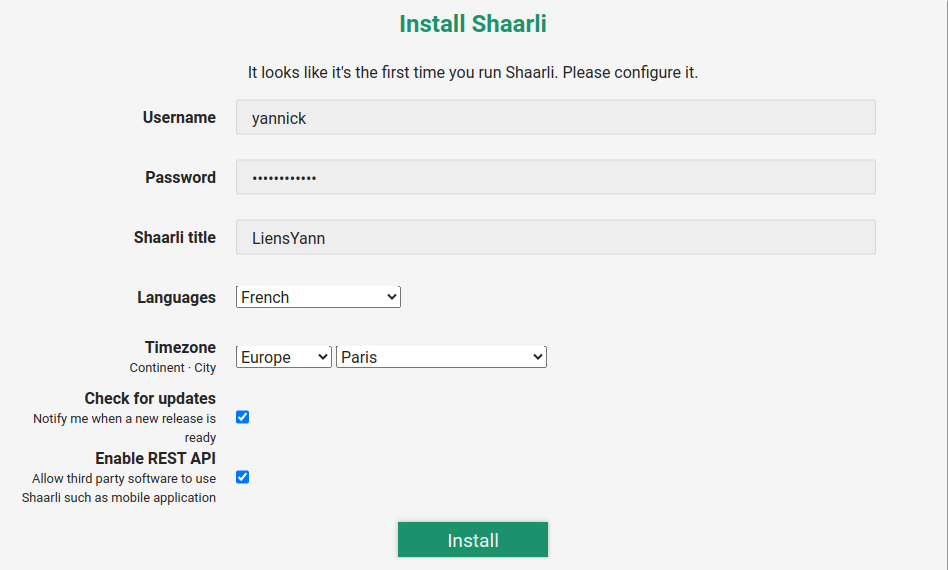
Après avoir cliqué sur “Install” on arrive sur la page de connexion
Pour une utilisation avec Lldap(A VERIFIER)
IP_SRV_LLDAP=127.0.0.1
Si utilisation serveur LLDAP, ajouter les lignes suivantes au fichier /var/www/shaarli.rnmkcy.eu/data/config.json.php
1
2
3
4

    "ldap": {
        "host": "ldap://127.0.0.1:3890",
        "dn": "uid=%s,ou=people,dc=domain,dc=com"
    }
Traduction (traduction.rnmkcy.eu)
LibreTranslate API de traduction
Une API pour la traduction accessible sur le lien https://traduction.rnmkcy.eu
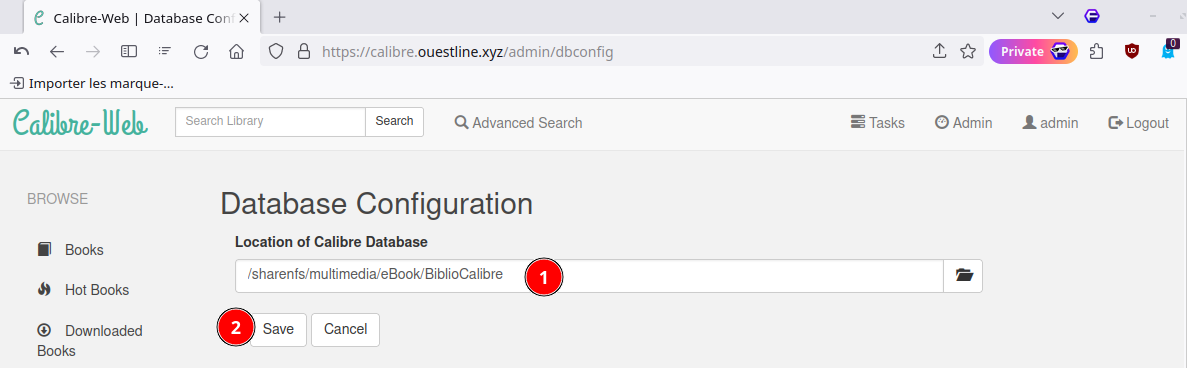
Calibre web (calibre.rnmkcy.eu)
![]()
https://github.com/janeczku/calibre-web
Environnement python
Vérifier python3
1

python3 -V
Python 3.11.2
Prérequis, installer pip et aussi venv pour votre version de python
1

sudo apt install python3-venv python3-dev
Création dossier puis un environnement virtuel pour calibre-web
1
2
3

sudo mkdir /home/leno/calibreweb
sudo chown $USER:$USER /home/leno/calibreweb
python3 -m venv /home/leno/calibreweb
Activer l’environnement
1

source /home/leno/calibreweb/bin/activate
On arrive sur le prompt ((calibreweb) leno@rnmkcy:~$
Installer calibre-web
1
2
3
4

pip3 install --upgrade pip
pip3 install wheel
pip3 install cmake
pip3 install calibreweb
Service calibreweb
Utilisation fichier systemd pour le lancement automatique
1

sudo nano /etc/systemd/system/calibreweb.service
Contenu du fichier
1
2
3
4
5
6
7
8
9
10
11

[Unit]
Description=Service calibreweb
After=network.target

[Service]
Type=simple
User=leno
ExecStart=/home/leno/calibreweb/bin/cps

[Install]
WantedBy=multi-user.target
ATTENTION! , User est l’utilisateur connecté ($USER)
Recharger et lancer le service calibreweb et vérifier
1
2

sudo systemctl daemon-reload
sudo systemctl start calibreweb
Vérifier et activer
1
2

sudo systemctl status calibreweb
sudo systemctl enable calibreweb
Proxy nginx
Si vous voulez utiliser nginx comme proxy , fichier de configuration /etc/nginx/conf.d/calibre.ouestline.xyz.conf
1
2
3
4
5
6
7
8
9
10
11
12
13
14
15
16
17
18
19
20
21
22
23
24
25
26
27
28

server {
    listen 80;
    listen [::]:80;
    server_name  calibre.ouestline.xyz;

    # redirect all plain HTTP requests to HTTPS
    return 301 https://calibre.ouestline.xyz$request_uri;
}

server {
    # ipv4 listening port/protocol
    listen       443 ssl http2;
    # ipv6 listening port/protocol
    listen           [::]:443 ssl http2;
    server_name  calibre.ouestline.xyz;

    include /etc/nginx/conf.d/security-ouestline.xyz.conf.inc;

    # connexion nginx fermée si sous domaine inexistant
    if ($http_host != "calibre.ouestline.xyz") {
     return 444;
    }

  location / {
     proxy_pass              http://127.0.0.1:8083;
  }

}
Ouvrir le lien https://calibre.ouestline.xyz
Par défaut admin admin123
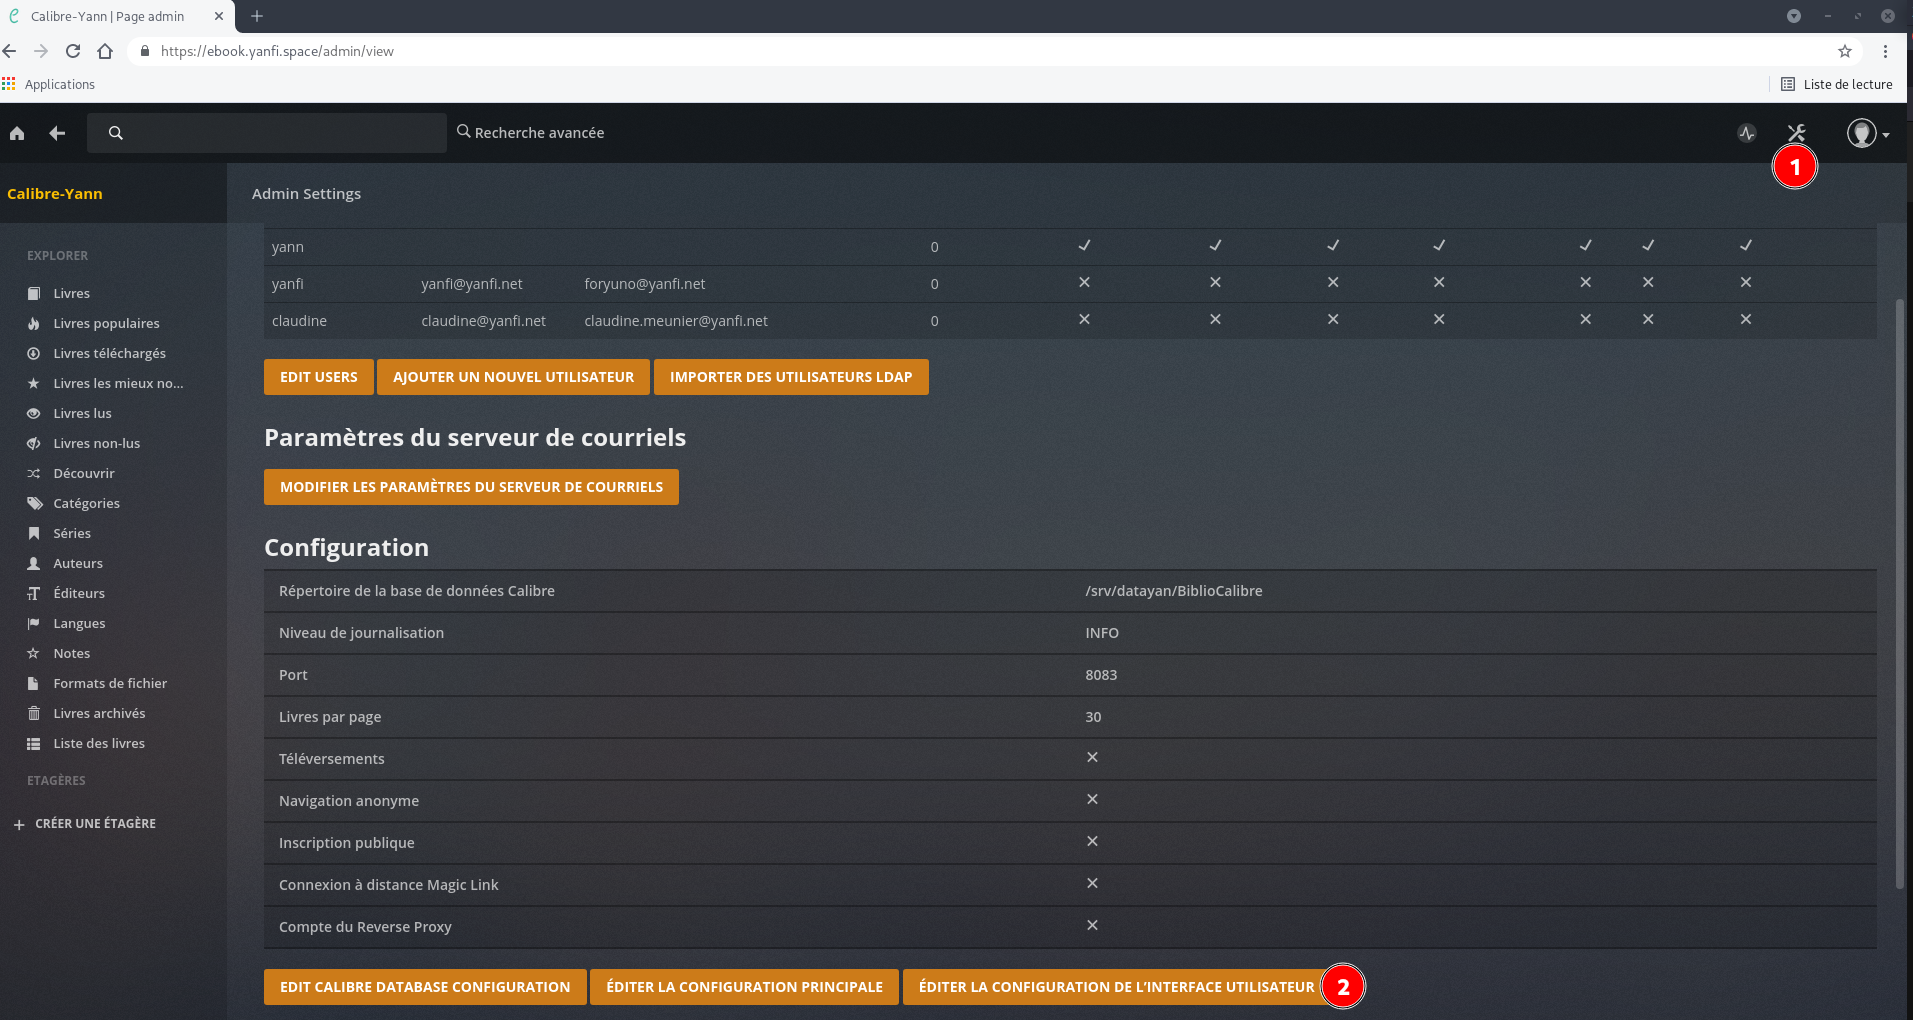
Cliquer sur Admin avec un grand A, pusi clic “Edit Users”
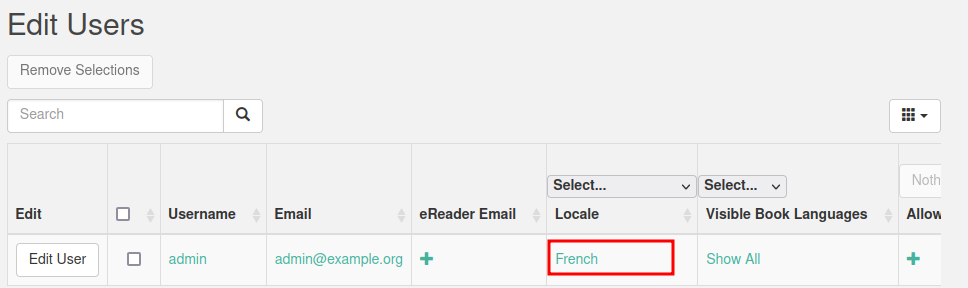
Clic sur “Back”, le menu s’affiche en français
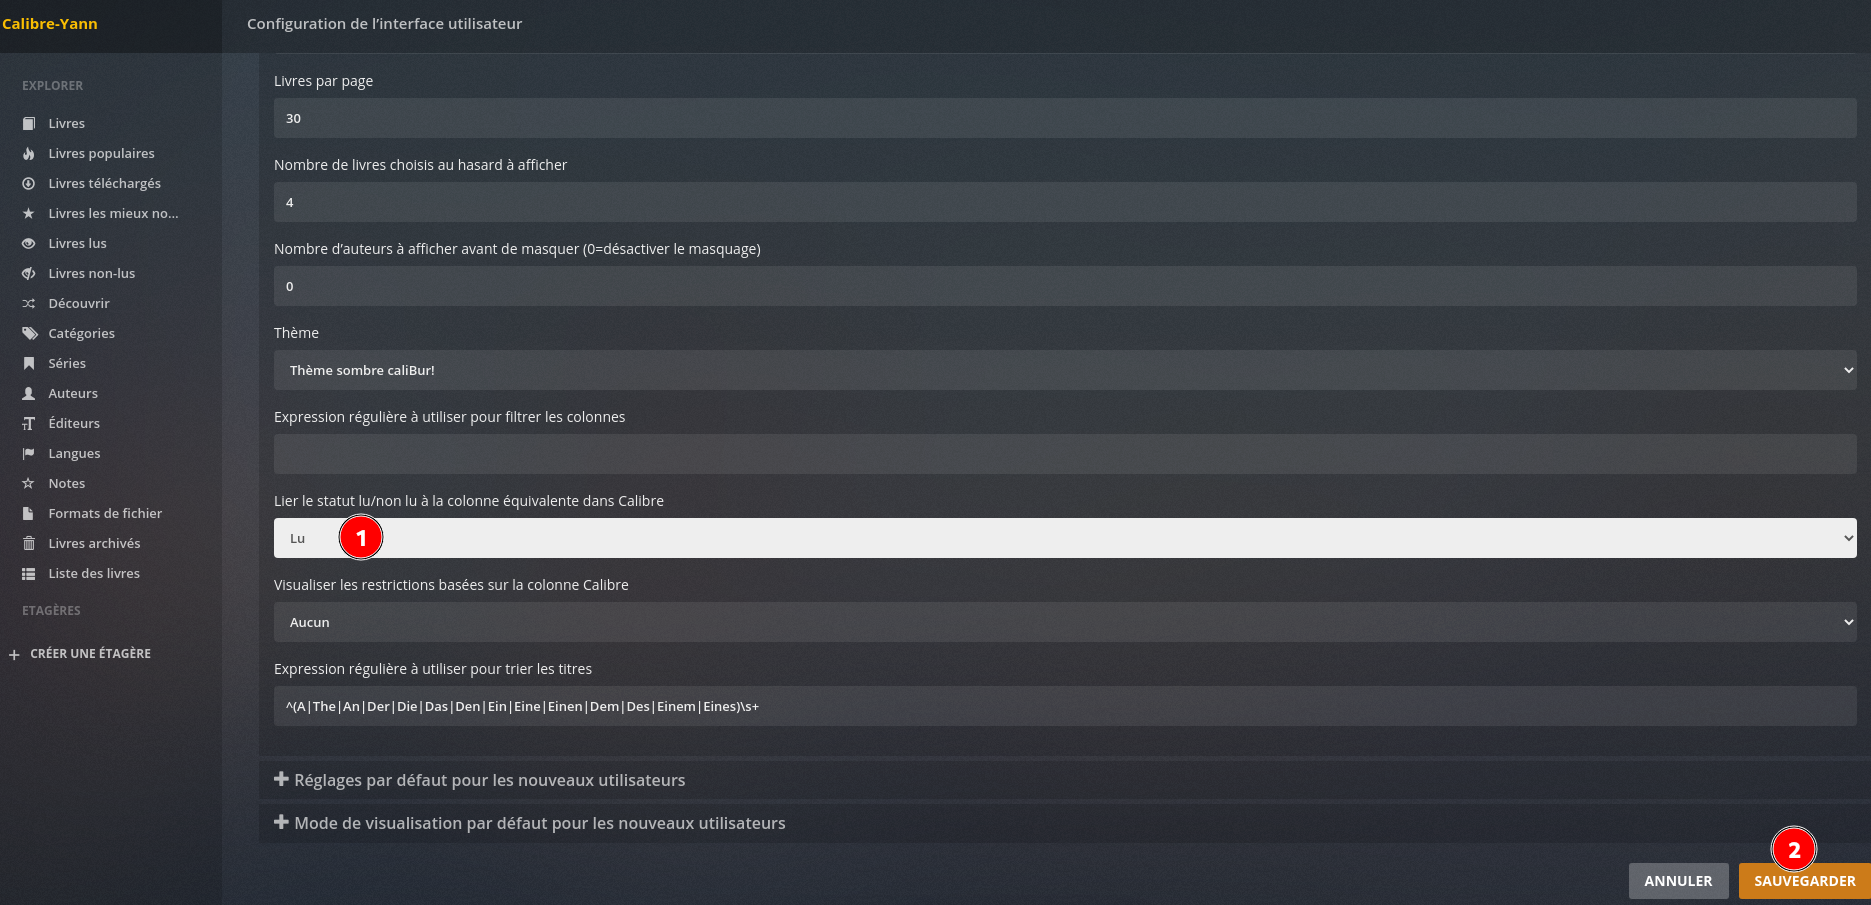
Configuration de l’interface utilisateur
Thème sombre puis clic “Sauvegarder”
Afficher champ lu/non lu
Authentification ldap
LDAP peut être utilisé comme fournisseur de connexion pour Calibre-Web. En fonction de votre distribution, certains paquets doivent être installés. Vous devez également installer les dépendances listées dans le fichier optional-requirements.txt dans la section LDAP.
Il faut installer des modules complémentaires
1
2
3

# ldap login
python-ldap>=3.0.0,<3.5.0
Flask-SimpleLDAP>=1.4.0,<1.5.0
Prérequis
sudo apt install libsasl2-dev python3-dev libldap2-dev libssl-dev
activer l’environnement
1

source /home/leno/calibreweb/bin/activate
On arrive sur le prompt ((calibreweb) leno@rnmkcy:~$
Installer python ldap
1
2

pip3 install python-ldap
pip3 install Flask-SimpleLDAP
Redémarrer le service
1

sudo systemctl restart calibreweb
Se connecter en admin sur le lien https://calibre.rnmkcy.eu
Après un redémarrage de Calibre-Web, vous devriez voir Flask_SimpleLDAP dans la section “A propos”.
Dans la section Admin -> Editer la configuration principale -> Configuration des options, une nouvelle option “Type de connexion” apparaît. Après avoir sélectionnée “Utiliser l’authentification LDAP” , vous devez configurer votre connexion LDAP :
Configuration lldap
Remplacer dc=rnmkcy,dc=eu avec le domaine configuré dans LLDAP
Version Anglaise
Login type : Use LDAP Authentication
LDAP Server Host Name or IP Address : 127.0.0.1
LDAP Server Port : 3890
LDAP Encryption : none
LDAP Authentication : simple
LDAP Administrator Username : uid=admin,ou=people,dc=rnmkcy,dc=eu
LDAP Administrator Password : MOT_PASSE_ADMIN_LDAP
LDAP Distinguished Name (DN) : dc=rnmkcy,dc=eu
LDAP User Object Filter : (&(objectclass=person)(uid=%s))
LDAP Server is OpenLDAP? : yes
LDAP Group Object Filter : (&(objectclass=groupOfUniqueNames)(cn=%s))
LDAP Group Name : calibre_web
Note: Créez un groupe dans lldap et ajoutez-y les utilisateurs qui auront accès à votre instance Calibre-Web.
LDAP Group Members Field : uniqueMember
LDAP Member User Filter Detection : Custom Filter
LDAP Member User Filter : (&(objectclass=person)(uid=%s))
Note: mettre en minuscule le mot “person” jusqu’à ce que ce bug soit corrigé
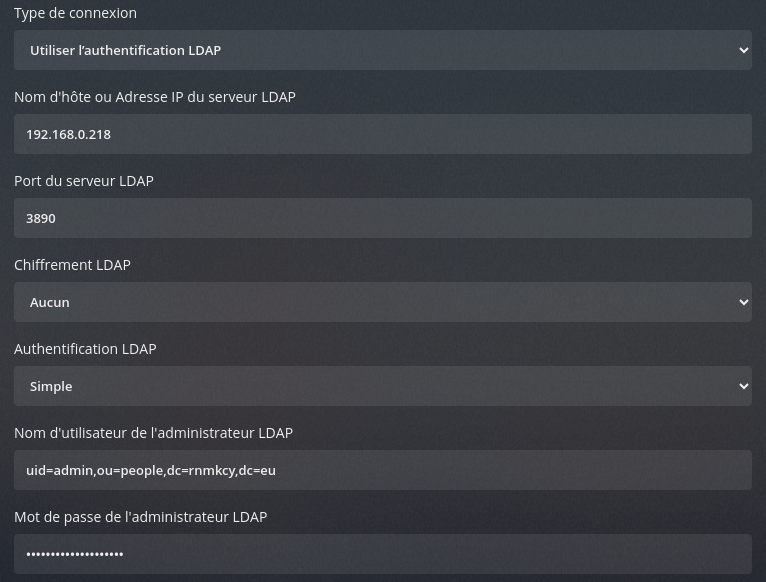
Version Française
Type de connexion : Utiliser l'authentificationLDAP
Nom d’hôte ou Adresse IP du serveur LDAP : 127.0.0.1
Port du serveur LDAP : 3890
Chiffrement LDAP : Aucun
Authentification LDAP : Simple
Nom d’utilisateur de l’administrateur LDAP : uid=admin,ou=people,dc=rnmkcy,dc=eu
Mot de passe de l’administrateur LDAP : MOT_PASSE_ADMIN_LDAP
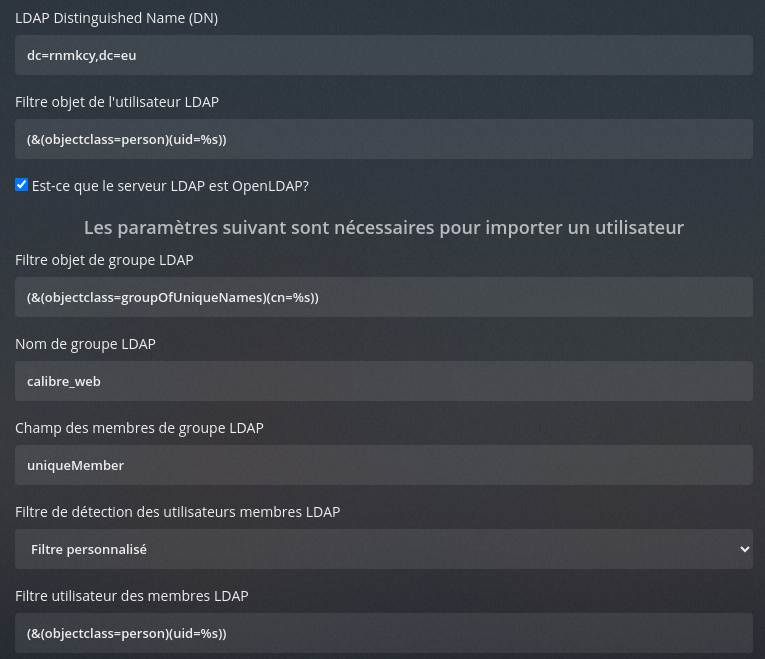
LDAP Distinguished Name (DN) : dc=rnmkcy,dc=eu
Filtre objet de l’utilisateur LDAP : (&(objectclass=person)(uid=%s))
Est-ce que le serveur LDAP est OpenLDAP? Cocher la case
Les paramètres suivant sont nécessaires pour importer un utilisateur
Filtre objet de groupe LDAP : (&(objectclass=groupOfUniqueNames)(cn=%s))
Nom de groupe LDAP : calibre_web
Note: Créez un groupe dans lldap et ajoutez-y les utilisateurs qui auront accès à votre instance Calibre-Web.
Champ des membres de groupe LDAP : uniqueMember
Filtre de détection des utilisateurs membres LDAP : Filtre personnalisé
Filtre utilisateur des membres LDAP : (&(objectclass=person)(uid=%s))
Images de la configuration
Cliquer sur SAUVEGARDER
Pour se connecter à Calibre-Web via LDAP, les utilisateurs doivent être créés ou importés dans Calibre-Web (le compte utilisateur doit être visible dans la section d’administration de Calibre-Web). Si vous entrez un mot de passe dans la section “Modifier l’utilisateur” pour votre compte administrateur, vous pouvez vous connecter en tant que solution de repli si le serveur LDAP n’est pas accessible (ou si la connexion est mal configurée). Dans le cas contraire, il n’est pas possible de se connecter à Calibre-Web et de modifier les paramètres. Si le serveur LDAP est hors service, aucun utilisateur sans mot de passe de secours ne peut se connecter à Calibre-Web. Les mots de passe des utilisateurs ne sont pas mis à jour/stockés dans la base de données de Calibre-Web. Tant que le serveur LDAP fonctionne, les utilisateurs avec le mot de passe de secours ne peuvent se connecter qu’avec leur mot de passe LDAP et non avec le mot de passe de secours.
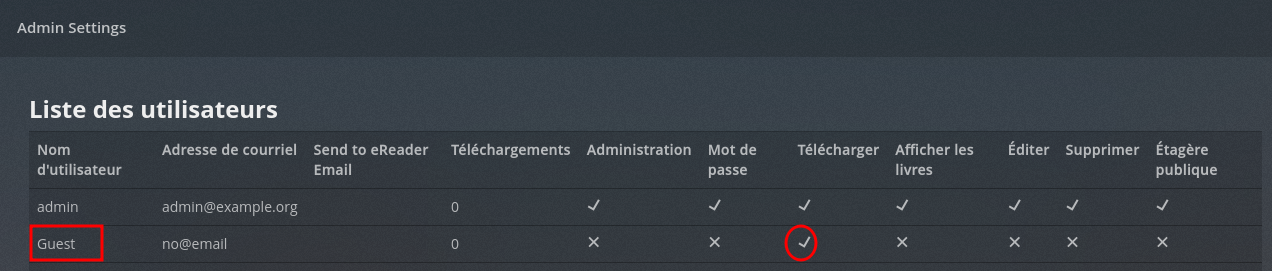
Connexion invité
La connexion invité ne nécessite pas de login et mot de passe
Elle est autorisée seulement car on utilise authelia comme portail SSO
Configuration authelia /etc/authelia/configuration.yml
1
2
3
4
5

access_control:
  default_policy: deny
  rules:
    - domain:
        - "calibre.rnmkcy.eu"
Paramétrage calibre-web
Accès bibliothèque et autorisation téléchargement
Rafraîchissement site calibre
Les modifications du dossier d’origine et de la base calibre sont synchronisées par rsync. Cependant la page web calibre n’est pas réactualisée, il faut relancer le service calibre par la commande systemctl restart calibreweb.
Pour automatiser la relance du service, on va s’appuyer sur le fait que la base calibre metadata.db change de date et heure à chaque modification
Nous allons surveiller dansle dossier /sharenfs/multimedia/eBook/BiblioCalibre/ toute modification du fichier metadata.db qui entrainera l’exécution d’un script
Dans le répertoire systemd nous créons une unité de cheminement calibreweb-modif.path
1

sudo nano /etc/systemd/system/calibreweb-modif.path
1
2
3
4
5
6
7
8
9

[Unit]
Description=Surveiller BiblioCalibre metadata.db

[Path]
PathChanged=/sharenfs/multimedia/eBook/BiblioCalibre/metadata.db
Unit=calibreweb-modif.service

[Install]
WantedBy=multi-user.target
Dans la section [Path], PathChanged= indique le chemin absolu du fichier à surveiller, tandis que Unit= indique l’unité de service à exécuter si le fichier change.
Le service calibreweb-modif.service
1
2
3
4
5
6
7
8

[Unit]
Description="Relance du service calibreweb"

[Service]
ExecStart=/usr/bin/systemctl restart calibreweb.service

[Install]
WantedBy=multi-user.target
Mise en place, il faut activer path
1

sudo systemctl enable calibreweb-modif.path --now
En cas de modifications : journalctl -u calibreweb-modif.service
1
2

juil. 23 11:50:16 rnmkcy.eu systemd[1]: Started calibreweb-modif.service - "Relance du service calibreweb".
juil. 23 11:50:16 rnmkcy.eu systemd[1]: calibreweb-modif.service: Deactivated successfully.
Gestion documents (only.rnmkcy.eu)
OnlyOffice Docs community (INACTIF)
Créer un serveur ONLYOFFICE sur un debian virtuel, voir OnlyOffice Debian Document Server
Accès via proxy adresse 192.168.0.217
Lien only.rnmkcy.eu avec jeton accès
Configuration /etc/nginx/conf.d/only.rnmkcy.eu.conf
1
2
3
4
5
6
7
8
9
10
11
12
13
14
15
16
17
18
19
20
21
22
23
24
25
26
27
28
29
30
31
32
33
34
35
36
37
38
39
40
41

server {
  listen 80;
  listen [::]:80;
  server_name  only.rnmkcy.eu;

  # redirect all plain HTTP requests to HTTPS
  return 301 https://only.rnmkcy.eu$request_uri;
}

server {
    listen 443 ssl http2;
    listen [::]:443 ssl http2;
    server_name only.rnmkcy.eu;

    include /etc/nginx/conf.d/security.conf.inc;


    more_set_headers "Strict-Transport-Security : max-age=63072000; includeSubDomains; preload";


		location / {

		 proxy_pass        http://192.168.0.217/;
		  proxy_http_version 1.1;
		  proxy_set_header Upgrade $http_upgrade;
		  #proxy_set_header Connection $proxy_connection;
		  proxy_set_header Connection "upgrade";
		  proxy_set_header  X-Forwarded-Host $server_name;
		  proxy_set_header  X-Forwarded-Proto $scheme;
		  proxy_set_header  X-Forwarded-For $proxy_add_x_forwarded_for;
		  proxy_redirect    off;
		  proxy_set_header  Host $host;
		  proxy_set_header  X-Real-IP $remote_addr;

		  more_set_headers "X-Frame-Options : ALLOW-FROM https://cloud.rnmkcy.eu always";
		  client_max_body_size 10M;
		}

    access_log /var/log/nginx/only.rnmkcy.eu-access.log;
    error_log /var/log/nginx/only.rnmkcy.eu-error.log;
}
Collabora Online
Notification (ntfy)
Audio (zic.rnmkcy.eu)
Nextcloud Music (OPTION)
- Je quitte Spotify pour mon propre cloud musical autohébergé !
- Créer facilement son cloud musical avec Nextcloud
Après activation application Music , se connecter en utilisateur et cliquer sur icône 
Ampache et Subsonic
Vous pouvez parcourir et écouter votre collection de musique à partir d’applications externes qui prennent en charge l’API Ampache ou Subsonic.
https://cloud.rnmkcy.eu/apps/music/ampache
Utilisez cette adresse pour parcourir votre collection musicale à partir d’un lecteur compatible avec Ampache. Si cette URL ne fonctionne pas, essayez d’ajouter ‘/server/xml.server.php’.
https://cloud.rnmkcy.eu/apps/music/subsonic
Utilisez cette adresse pour parcourir votre collection de musique à partir d’un lecteur compatible Subsonic.
Ici, vous pouvez générer des mots de passe à utiliser avec l’API Ampache ou Subsonic. Des mots de passe séparés sont utilisés parce qu’ils ne peuvent pas être stockés de manière vraiment sécurisée en raison de la conception des API. Vous pouvez générer autant de mots de passe que vous le souhaitez et les révoquer à tout moment.

Navidrome
Audio Navidrome, installation sur debian
Version 051.1 au 24/03/2024
1
2
3

wget https://github.com/navidrome/navidrome/releases/download/v0.51.1/navidrome_0.51.1_Linux_amd64.tar.gz -O Navidrome.tar.gz
sudo tar -xvzf Navidrome.tar.gz -C /opt/navidrome/
sudo chown -R navidrome:navidrome /opt/navidrome
créer un nouveau fichier nommé /var/lib/navidrome/navidrome.toml avec les paramètres suivants.
1
2
3
4

# Dossier où est stockée votre bibliothèque musicale
MusicFolder = "/sharenfs/multimedia/Music/musicyan"
# Définir la langue par défaut
DefaultLanguage="fr"
Créer une unité Système /etc/systemd/system/navidrome.service avec les données suivantes.
1
2
3
4
5
6
7
8
9
10
11
12
13
14
15
16
17
18
19
20
21
22
23
24
25
26
27
28
29
30
31
32
33
34
35
36
37
38
39
40
41
42
43
44
45
46
47

[Unit]
Description=Navidrome Music Server and Streamer compatible with Subsonic/Airsonic
After=remote-fs.target network.target
AssertPathExists=/var/lib/navidrome

[Install]
WantedBy=multi-user.target

[Service]
User=navidrome
Group=navidrome
Type=simple
ExecStart=/opt/navidrome/navidrome --configfile "/var/lib/navidrome/navidrome.toml"
WorkingDirectory=/var/lib/navidrome
TimeoutStopSec=20
KillMode=process
Restart=on-failure

# See https://www.freedesktop.org/software/systemd/man/systemd.exec/
DevicePolicy=closed
NoNewPrivileges=yes
PrivateTmp=yes
PrivateUsers=yes
ProtectControlGroups=yes
ProtectKernelModules=yes
ProtectKernelTunables=yes
RestrictAddressFamilies=AF_UNIX AF_INET AF_INET6
RestrictNamespaces=yes
RestrictRealtime=yes
SystemCallFilter=~@clock @debug @module @mount @obsolete @reboot @setuid @swap
ReadWritePaths=/var/lib/navidrome

# You can uncomment the following line if you're not using the jukebox This
# will prevent navidrome from accessing any real (physical) devices
#PrivateDevices=yes

# You can change the following line to `strict` instead of `full` if you don't
# want navidrome to be able to write anything on your filesystem outside of
# /var/lib/navidrome.
ProtectSystem=full

# You can uncomment the following line if you don't have any media in /home/*.
# This will prevent navidrome from ever reading/writing anything there.
#ProtectHome=true

# You can customize some Navidrome config options by setting environment variables here. Ex:
#Environment=ND_BASEURL="/navidrome"
Rechargez le démon de service, lancez le nouveau service et vérifiez
1
2
3

sudo systemctl daemon-reload
sudo systemctl enable navidrome.service --now
sudo systemctl status navidrome.service
Si le service a démarré correctement, vérifiez que vous pouvez accéder à http://localhost:4533.
Ouvrir un terminal sur le client linux qui dispose des clés ssh et lancer la commande
1

ssh -L 9500:localhost:4533  leno@192.168.0.215 -p 55215 -i /home/yann/.ssh/lenovo-ed25519
Créer un compte administrateur : yann
Proxy nginx /etc/nginx/conf.d/zic.rnmkcy.eu
1
2
3
4
5
6
7
8
9
10
11
12
13
14
15
16
17
18
19
20
21
22
23
24
25
26
27
28
29
30

server {
    listen 80;
    listen [::]:80;
    server_name  zic.rnmkcy.eu;

    # redirect all plain HTTP requests to HTTPS
    return 301 https://zic.rnmkcy.eu$request_uri;
}

server {
    # ipv4 listening port/protocol
    listen       443 ssl http2;
    # ipv6 listening port/protocol
    listen           [::]:443 ssl http2;
    server_name  zic.rnmkcy.eu;

    include /etc/nginx/conf.d/security.conf.inc;

  location / {
      proxy_pass              http://127.0.0.1:4533;
      proxy_set_header Host $host;
      proxy_set_header X-Real-IP $remote_addr;
      proxy_set_header X-Forwarded-For $proxy_add_x_forwarded_for;
      proxy_set_header X-Forwarded-Proto $scheme;
      proxy_set_header X-Forwarded-Protocol $scheme;
      proxy_set_header X-Forwarded-Host $http_host;
      proxy_buffering off;
  }

}
Application web radiolise
Les versions node
1
2
3
4

$ node -v --> v20.10.0
$ npm -v  --> 10.8.1
$ echo $PATH
/home/leno/.nvm/versions/node/v20.10.0/bin:/usr/local/bin:/usr/bin:/bin:/usr/local/games:/usr/games:/usr/local/go/bin
Installer Radiolise
1

npm install -g radiolise
L’option -g indique à npm d’installer le module dans le monde entier, afin qu’il soit disponible dans tout le système.
Ensuite, démarrez le serveur à chaque fois en tapant simplement
1

radiolise
1
2
3
4

ᯤ  Welcome to Radiolise v5.9.0
Enjoy your favorite TV and radio streams!

Server listening on: http://127.0.0.1:56225/
arrêt par Ctrl+C
Où est l’application : whereis radiolise
radiolise: /home/leno/.nvm/versions/node/v20.10.0/bin/radiolise
Créer un service utilisateur ~/.config/systemd/user/radiolise.service
1
2
3

cd /home/leno
# créer dossier systemd utilisateur
mkdir -p ~/.config/systemd/user/
Le service
1
2
3
4
5
6
7
8

[Unit]
Description=Application radiolise port 56225

[Service]
ExecStart=/home/leno/.nvm/versions/node/v20.10.0/bin/radiolise

[Install]
WantedBy=default.target
Lancer et activer le service
1
2
3

systemctl --user daemon-reload
systemctl enable --user radiolise.service --now
systemctl status --user radiolise.service
Radicale (INACTIF)
Pour réduire la dépendance aux produits Google , héberger un serveur CardDav et CalDav à l’aide de Radicale
Radicale serveur de calendrier et contacts
Deux options pour nginx
- Radicale dans un sous-répertoire de NGINX webroot et l’instance est accessible via http://example.com/radicale
- Radicale est placé dans le webroot de votre installation nginx et l’instance est accessible via http://radicale.example.com
Cockpit Web (cockpit.rnmkcy.eu)
Installation application → Cockpit
Domaine : cockpit.rnmkcy.eu
Fichier de configuration nginx /etc/nginx/conf.d/cockpit.rnmkcy.eu.conf
1
2
3
4
5
6
7
8
9
10
11
12
13
14
15
16
17
18
19
20
21
22
23
24
25
26
27
28
29
30
31
32

server {
    listen 80;
    listen [::]:80;
    server_name  cockpit.rnmkcy.eu;
    return 301 https://cockpit.rnmkcy.eu$request_uri;
}

server {
    listen       443 ssl http2;
    listen       [::]:443 ssl http2;
    server_name  cockpit.rnmkcy.eu;

    include /etc/nginx/conf.d/security.conf.inc;

    location / {
        # Required to proxy the connection to Cockpit
        proxy_pass https://127.0.0.1:9090;
        proxy_set_header Host $host;
        proxy_set_header X-Forwarded-Proto $scheme;

        # Required for web sockets to function
        proxy_http_version 1.1;
        proxy_buffering off;
        proxy_set_header Upgrade $http_upgrade;
        proxy_set_header Connection "upgrade";

        # Pass ETag header from Cockpit to clients.
        # See: https://github.com/cockpit-project/cockpit/issues/5239
        gzip off;
    }

}
Vérification et rechargement nginx
1
2

nginx -t
systemctl reload nginx
Gestion photos (INACTIF)
HomeGallery
Création du dossier photos
1
2

sudo mkdir /sharenfs/photos
sudo chown $USER:$USER /sharenfs/photos
Installer HomeGallery sur le serveur virtuel “debsrv01” (Lenovo KVM - Serveur virtuel Debian 12 + Jekyll)
Création fichier de configuration nginx /etc/nginx/conf.d/photo.rnmkcy.eu.conf
1
2
3
4
5
6
7
8
9
10
11
12
13
14
15
16
17
18
19
20
21
22
23
24
25
26
27
28

server {
    listen 80;
    listen [::]:80;
    server_name  photo.rnmkcy.eu;

    # redirect all plain HTTP requests to HTTPS
    return 301 https://photo.rnmkcy.eu$request_uri;
}

server {
    # ipv4 listening port/protocol
    listen       443 ssl http2;
    # ipv6 listening port/protocol
    listen           [::]:443 ssl http2;
    server_name  photo.rnmkcy.eu;

    include /etc/nginx/conf.d/security.conf.inc;

    # connexion nginx fermée si sous domaine inexistant
    if ($http_host != "photo.rnmkcy.eu") {
     return 444;
    }

  location / {
     proxy_pass              http://192.168.0.219:3000;
  }

}
Recharger nginx
1

sudo systemctl reload nginx
Le lien https://photo.rnmkcy.eu
RSS (rss.rnmkcy.eu)
KVM - Alpine ttrss
Lenovo KVM - Alpine Linux Tiny Tiny RSS
Le lien https://flux.rnmkcy.eu
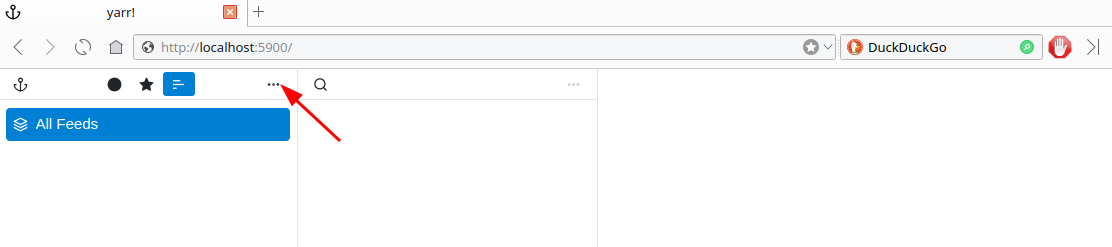
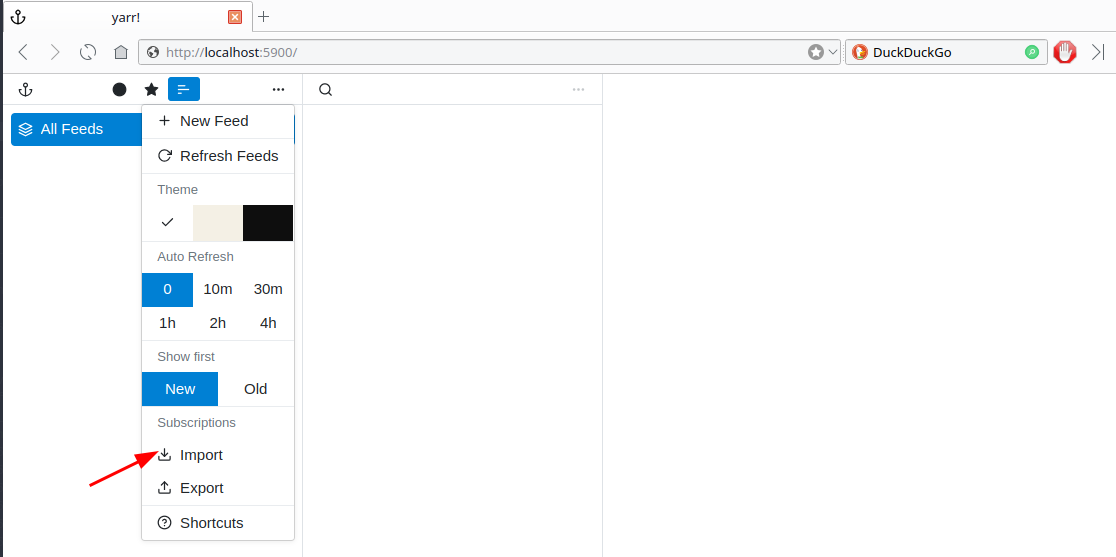
Yarr RSS (INACTIF)
yarr (yet another rss reader) est un agrégateur de flux basé sur le web qui peut être utilisé à la fois comme application de bureau et comme serveur personnel auto-hébergé.
L’application est un simple binaire avec une base de données intégrée (SQLite).
1 - Installer binaire yarr
Les derniers binaires préconstruits pour Linux/MacOS/Windows AMD64 sont disponibles ici
Télécharger, décompresser le zip et placer le binaire linux dans le dossier /usr/local/bin/
1
2
3

wget https://github.com/nkanaev/yarr/releases/download/v2.4/yarr-v2.4-linux64.zip
unzip yarr-v2.4-linux64.zip
sudo mv yarr /usr/local/bin/
Lancer l’exécutable : yarr
1
2

[...]
2024/06/04 14:08:16 main.go:150: starting server at http://127.0.0.1:7070
Test sur navigateur
1

ssh -L 5900:127.0.0.1:7070 leno@192.168.0.215 -p 55215 -i /home/yann/.ssh/lenovo-ed25519
Ouvrir le lien localhost:5900 dans un navigateur

2 - Service yarr-daemaon
Créer un service /etc/systemd/system/yarr-daemaon.service pour lancer l’exécutable
1
2
3
4
5
6
7
8
9
10
11
12
13

[Unit]
Description=RSS yarr server

[Service]
Type=simple
Restart=always
User=leno
Group=leno
WorkingDirectory=/home/leno/.config/yarr
ExecStart=/usr/local/bin/yarr

[Install]
WantedBy=multi-user.target
Lancer et activer le service
1
2

sudo systemctl daemon-reload
sudo systemctl enable yarr-daemaon --now
Vérifier status : systemctl status yarr-daemaon
1
2
3
4
5
6
7
8
9
10
11
12
13
14
15
16

● yarr-daemaon.service - RSS yarr server
     Loaded: loaded (/etc/systemd/system/yarr-daemaon.service; enabled; preset: enabled)
     Active: active (running) since Tue 2024-06-04 14:53:13 CEST; 5s ago
   Main PID: 739708 (yarr)
      Tasks: 8 (limit: 14162)
     Memory: 13.5M
        CPU: 114ms
     CGroup: /system.slice/yarr-daemaon.service
             └─739708 /usr/local/bin/yarr

juin 04 14:53:13 rnmkcy.eu systemd[1]: Started yarr-daemaon.service - RSS yarr server.
juin 04 14:53:13 rnmkcy.eu yarr[739708]: 2024/06/04 14:53:13 main.go:105: using db file /home/leno/.config/yarr/storage.db
juin 04 14:53:13 rnmkcy.eu yarr[739708]: 2024/06/04 14:53:13 main.go:150: starting server at http://127.0.0.1:7070
juin 04 14:53:13 rnmkcy.eu yarr[739708]: 2024/06/04 14:53:13 worker.go:76: auto-refresh 10m: starting
juin 04 14:53:13 rnmkcy.eu yarr[739708]: 2024/06/04 14:53:13 worker.go:105: Refreshing feeds
juin 04 14:53:13 rnmkcy.eu yarr[739708]: 2024/06/04 14:53:13 worker.go:135: Finished refreshing 4 feeds
3 - Proxy yarr nginx
Le fichier de configuration /etc/nginx/conf.d/yarr.rnmkcy.eu.conf
1
2
3
4
5
6
7
8
9
10
11
12
13
14
15
16
17
18
19
20
21
22
23

server {
    listen 80;
    listen [::]:80;
    server_name  yarr.rnmkcy.eu;

    # redirect all plain HTTP requests to HTTPS
    return 301 https://yarr.rnmkcy.eu$request_uri;
}

server {
    # ipv4 listening port/protocol
    listen       443 ssl http2;
    # ipv6 listening port/protocol
    listen           [::]:443 ssl http2;
    server_name  yarr.rnmkcy.eu;

    include /etc/nginx/conf.d/security.conf.inc;

  location / {
     proxy_pass              http://127.0.0.1:7070;
  }

}
Recharger nginx : sudo systemctl reload nginx
Visiter le lien https://yarr.rnmkcy.eu
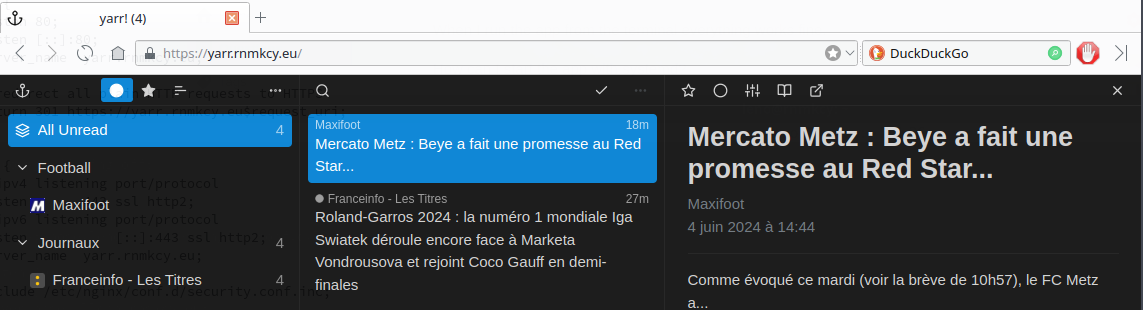
Webmail SnappyMail (webmail.rnmkcy.eu)
![]()
Client de messagerie web simple multi-domaine, moderne, léger et rapide
Installation
On passe en mode administrateur
1

sudo -s
Créer le dossier d’installation
1

mkdir -p /var/www/webmail
Téléchargement dernière version snappymail
1
2

cd /var/www/webmail
wget https://snappymail.eu/repository/latest.tar.gz
Extraction
1
2

tar -xzf latest.tar.gz
rm latest.tar.gz
Autorisations
1
2
3
4

# Définir les autorisations
find /var/www/webmail/snappymail -type d -exec chmod 755 {} \;
find /var/www/webmail/snappymail -type f -exec chmod 644 {} \;
chown -R www-data:www-data /var/www/webmail/snappymail
Configuration nginx
Le fichier de configuration nginx /etc/nginx/conf.d/webmail.rnmkcy.eu.conf
Etendre Réduire webmail.rnmkcy.eu.conf
###
# Redirect non-secure (unencrypted) HTTP to the more secure (encrypted) HTTPS
server {
	listen 80 default_server;
	listen [::]:80 default_server;
	server_name _;
	return 301 https://$host$request_uri;
}

###
# Actual domain configuration
server {
	###
	# TLS for the win!
	listen 443 ssl http2;
	listen [::]:443 ssl http2;

	###
	# Domain name
	server_name webmail.rnmkcy.eu;

	###
	# SSL configuration
        ssl_certificate /etc/ssl/private/rnmkcy.eu-fullchain.pem;
        ssl_certificate_key /etc/ssl/private/rnmkcy.eu-key.pem;
	ssl_protocols TLSv1.2 TLSv1.3;
	ssl_ciphers "ECDHE-ECDSA-CHACHA20-POLY1305:ECDHE-RSA-CHACHA20-POLY1305:DHE-RSA-CHACHA20-POLY1305:AES-256-GCM-SHA384:EECDH+AESGCM:EDH+AESGCM";
	ssl_ecdh_curve secp521r1:secp384r1;
	ssl_session_timeout  10m;
	ssl_session_cache    shared:SSL:10m;
	ssl_session_tickets off;
	ssl_prefer_server_ciphers on;

	###
	# Security headers
	add_header Strict-Transport-Security "max-age=15768000; includeSubDomains; preload;" always;
	add_header X-Content-Type-Options "nosniff" always;
	add_header X-XSS-Protection "1; mode=block" always;
	add_header X-Robots-Tag "none" always;
	add_header X-Download-Options "noopen" always;
	add_header X-Permitted-Cross-Domain-Policies "none" always;
	add_header Referrer-Policy "no-referrer" always;
	add_header X-Frame-Options "SAMEORIGIN" always;
	fastcgi_hide_header X-Powered-By;

	###
	# GZIP / compression settings
	gzip on;
	gzip_vary on;
	gzip_comp_level 4;
	gzip_min_length 256;
	gzip_proxied expired no-cache no-store private no_last_modified no_etag auth;
	gzip_types application/atom+xml application/javascript application/json application/ld+json application/manifest+json application/rss+xml application/vnd.geo+json application/vnd.ms-fontobject application/x-font-ttf application/x-web-app-manifest+json application//+xml application/xml font/opentype image/bmp image/svg+xml image/x-icon text/cache-manifest text/css text/plain text/vcard text/vnd.rim.location.xloc text/vtt text/x-component text/x-cross-domain-policy;

	###
	# Define the document root
	root /var/www/webmail;
	index index.php;

	client_max_body_size 50M;

	###
	# Forbid access to dotfiles
	location ~ (^|/)\. {
		return 403;
	}

	###
	# The actual root location
	location / {
                try_files $uri $uri/ /index.php?$args;
	}

	###
	# Last but not least, the PHP-FPM settings
	location ~* \.php$ {
		fastcgi_pass    unix:/var/run/php/php8.3-fpm.sock;
		include         fastcgi_params;
		fastcgi_param   SCRIPT_FILENAME    $document_root$fastcgi_script_name;
		fastcgi_param   SCRIPT_NAME        $fastcgi_script_name;
	}

}
Recharger nginx
1

sudo systemctl reload nginx
Accés page administration
Ouvrez l’interface d’administration https://webmail.rnmkcy.eu/?admin pour configurer les paramètres de votre serveur de messagerie.
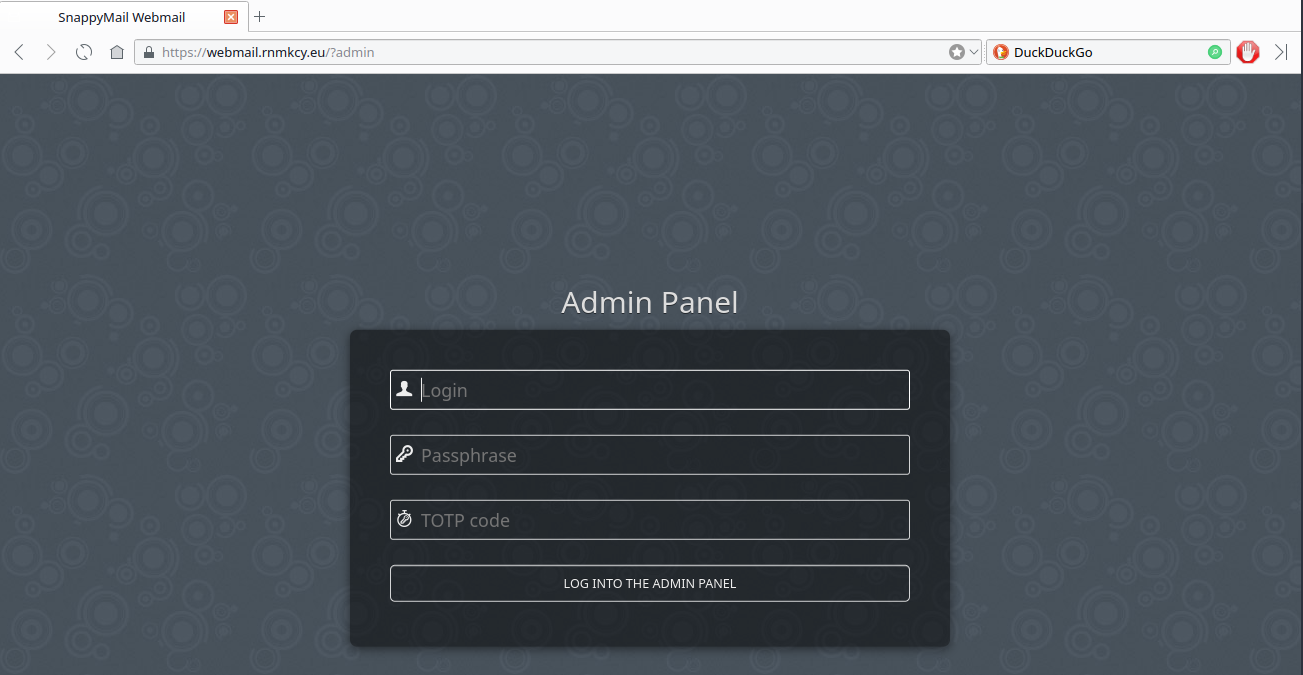
Connectez-vous avec l’utilisateur “admin” et le mot de passe du fichier /var/www/webmail/data/_data_/_default_/admin_password.txt.
Si vous avez des problèmes pour appeler l’interface d’administration, essayez de le faire en mode privé de votre navigateur. De cette façon, les cookies et autres données mises en cache lors d’installations précédentes sont ignorés.
Mot de passe admin
Le fichier de mot de passe est créé après l’ouverture de l’interface d’administration !
Assurez-vous de changer immédiatement le mot de passe par défaut !
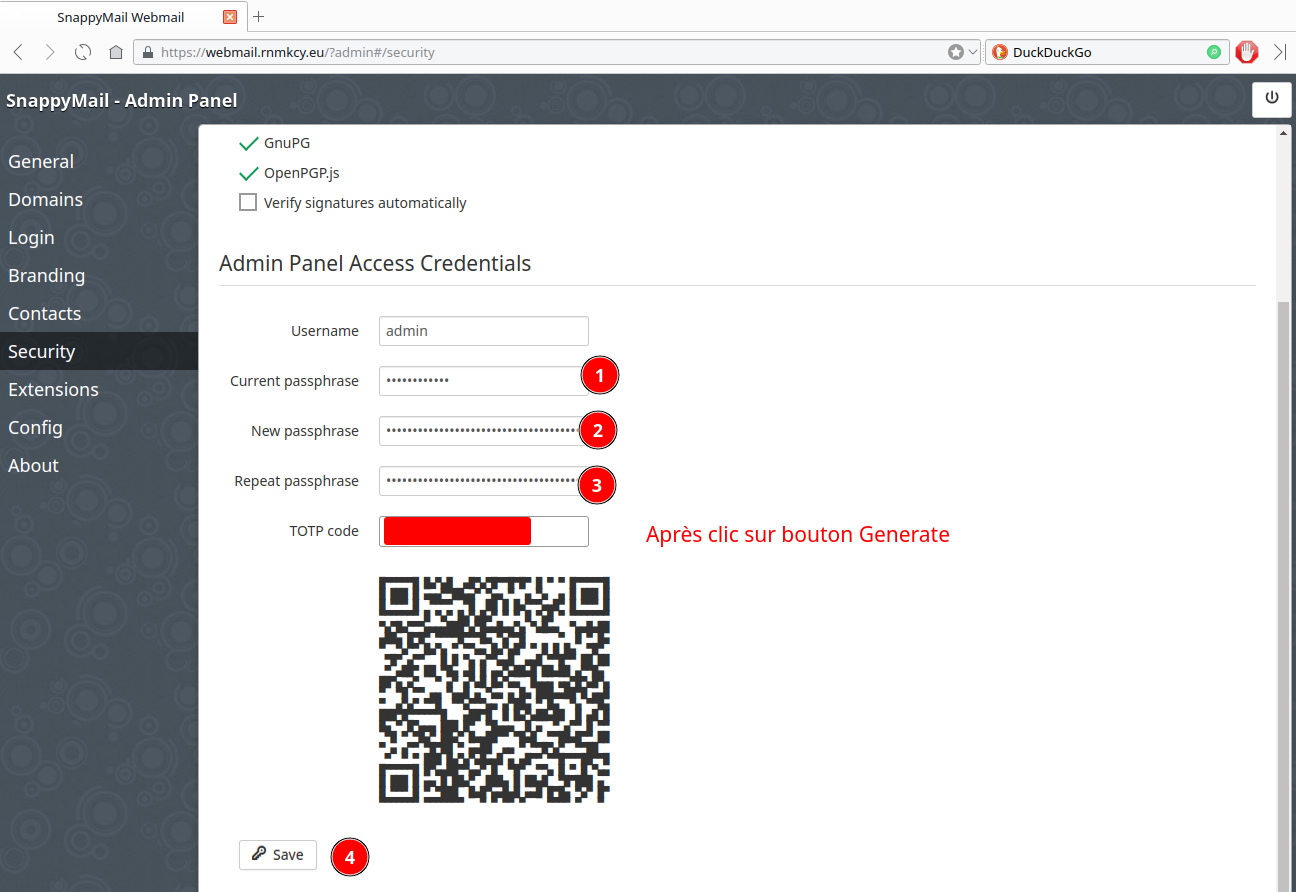
après avoir changé le mot de passe par défaut, le fichier admin_password.txt est supprimé.

Interface admin en français
Domaines de messagerie
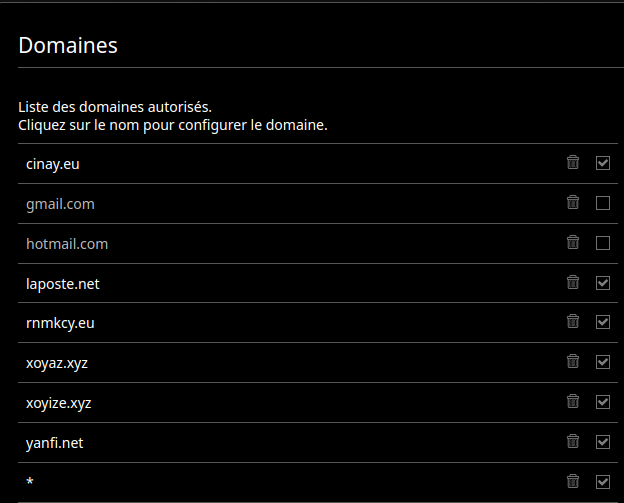
Authentification 2FA pour les utilisateurs, il faut “Activer les plugins” et télécharger le plugin “Two Factor Authentication” puis cocher pour valider
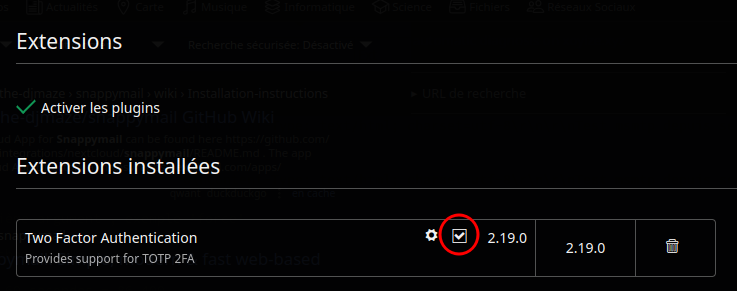
Le code TOTP défini pour "admin" sera en vigueur pour tout les utilisateurs
SearXNG (searx.rnmkcy.eu)
SearXNG est un métamoteur qui recherche ses informations à travers plusieurs moteurs de recherche généralistes
Installation
Lenovo KVM - SearXNG Alpine Linux (alpine-searx)
Le lien à ajouter dans les moteurs de recherche : https://searx.rnmkcy.eu/search?q=%s
Gitea (gitea.rnmkcy.eu)
Gitea est une forge logicielle libre en Go sous licence MIT, pour l’hébergement de développement logiciel, basé sur le logiciel de gestion de versions Git pour la gestion du code source, comportant un système de suivi des bugs, un wiki, ainsi que des outils pour la relecture de code.
Gpx studio (gpx.rnmkcy.eu)
Mesure vitesse internet (speed.rnmkcy.eu)
Authentification unique (SSO Authelia + LLdap)
L’authentification unique, souvent désignée par le sigle anglais SSO (de single sign-on) est une méthode permettant à un utilisateur d’accéder à plusieurs applications informatiques (ou sites web sécurisés) en ne procédant qu’à une seule authentification.(Authentification unique ![]() )
)
Light Lightweight Directory Access Protocol (LLDAP) est à l’origine un protocole permettant l’interrogation et la modification des services d’annuaire. Ce protocole repose sur TCP/IP. Il a cependant évolué pour représenter une norme pour les systèmes d’annuaires, incluant un modèle de données, un modèle de nommage, un modèle fonctionnel basé sur le protocole LDAP, un modèle de sécurité et un modèle de réplication. C’est une structure arborescente dont chacun des nœuds est constitué d’attributs associés à leurs valeurs
Avec une solution SSO, le login est redirigé vers une seule application et l’utilisateur se verra toujours présenter la même page de connexion quelque soient les applications finales qu’il utilisera.
ATTENTION: Le service authelia est en erreur sytématiquement après un redémarrage car la machine virtuelle KVM lldap (hébergée dans le serveur Lenovo) n’est pas entièrement active lorsque le service authelia est lancé
SOLUTION: Il faut retarder le lancement du service authelia de 30s en ajoutant la ligne ExecStartPre=/bin/sleep 30 avant ExecStart=/usr/bin/authelia --config /etc/authelia/configuration.yml dans le fichier /lib/systemd/system/authelia.service
LLdap - Gestionnaire web (lldap.rnmkcy.eu)
Gestion de l’annuaire lldap des utilisateurs
Création proxy nginx pour le gestionnaire web LLdap
1

/etc/nginx/conf.d/lldap.rnmkcy.eu.conf
1
2
3
4
5
6
7
8
9
10
11
12
13
14
15
16
17
18
19
20
21
22
23
24
25
26
27
28

server {
    listen 80;
    listen [::]:80;
    server_name  lldap.rnmkcy.eu;

    # redirect all plain HTTP requests to HTTPS
    return 301 https://lldap.rnmkcy.eu$request_uri;
}

server {
    # ipv4 listening port/protocol
    listen       443 ssl http2;
    # ipv6 listening port/protocol
    listen           [::]:443 ssl http2;
    server_name  lldap.rnmkcy.eu;

    include /etc/nginx/conf.d/security.conf.inc;

    # connexion nginx fermée si sous domaine inexistant
    if ($http_host != "lldap.rnmkcy.eu") {
     return 444;
    }

  location / {
     proxy_pass              http://127.0.0.1:17170;
  }

}
Vérifier et recharger nginx: sudo nginx -t && sudo systemctl reload nginx
Accès par le lien https://lldap.rnmkcy.eu/
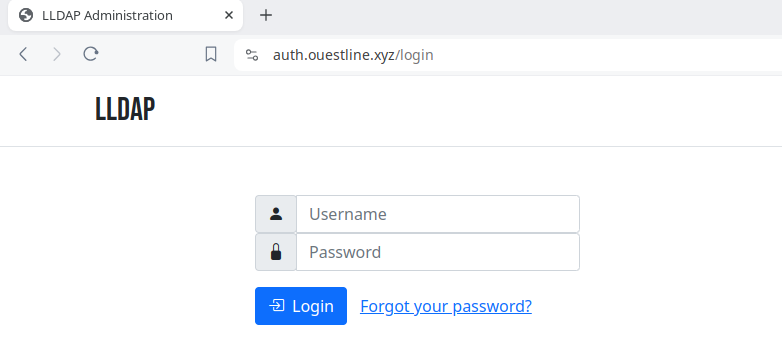
Authelia SSO+Nginx (auth.rnmkcy.eu)
![]()
Authelia pour gérer les autorisations d’accès à des applications en s’appuyant sur l’annuaire lldap
Modifier authentication_backend dans le fichier de configuration authelia pour communiquer avec le serveur lldap
1
2
3
4
5
6
7
8
9
10
11
12
13
14
15
16
17
18
19
20
21
22
23
24
25
26
27
28
29
30
31
32
33
34
35
36
37
38
39
40
41
42
43
44

authentication_backend:
  # Password reset through authelia works normally.
  password_reset:
    disable: false
  # How often authelia should check if there is an user update in LDAP
  refresh_interval: 1m
  ldap:
    implementation: custom
    # Pattern is ldap://HOSTNAME-OR-IP:PORT
    # Port de saut normal est 389, standard dans LLDAP est 3890
    url: ldap://127.0.0.1:3890
    # The dial timeout for LDAP.
    timeout: 5s
    # Utilisez StartTLS avec la connexion LDAP, TLS est non supporté maintenant
    start_tls: false
    #tls:
    #  skip_verify: false
    #  minimum_version: TLS1.2
    # Set base dn, like dc=google,dc.com
    base_dn: dc=rnmkcy,dc=eu
    username_attribute: uid
    # Vous devez configurer cela à ou=people, parce que tous les utilisateurs sont stockés dans cette ou!
    additional_users_dn: ou=people
    # Pour permettre la connexion avec le nom d'utilisateur et l'email
    # on peut utiliser un filtre comme
    # (&(|({username_attribute}={input})({mail_attribute}={input}))(objectClass=person))
    users_filter: "(&({username_attribute}={input})(objectClass=person))"
    # Définir ceci à ou=groups, parce que tous les groupes sont stockés dans cette ou
    additional_groups_dn: ou=groups
    # Les groupes ne sont pas affichés dans l'interface utilisateur, mais ce filtre fonctionne.
    groups_filter: "(member={dn})"
    # L'attribut tenant le nom du groupe.
    group_name_attribute: cn
    # Attribut email
    mail_attribute: mail
    # L'attribut tenant le nom d'affichage de l'utilisateur.
    # Cela sera utilisé pour accueillir un utilisateur authentifié.
    display_name_attribute: displayName
    # Le nom d'utilisateur et mot de passe de l'utilisateur admin.
    # "admin" devrait être le nom d'utilisateur administrateur que vous définissez dans la configuration LLDAP
    user: uid=admin,ou=people,dc=rnmkcy,dc=eu
    # Le mot de passe peut également être défini en utilisant un secret:
    # https://www.authelia.com/docs/configuration/secrets/
    password: '<Mot de passe administrateur ldap>'
Le fichier complet de configuration authelia /etc/authelia/configuration.yml
Etendre Réduire configuration.yml
###############################################################################
# Authelia Configuration #
###############################################################################
theme: dark
##
## Identity Validation Configuration
##
## This configuration tunes the identity validation flows.
identity_validation:
## Reset Password flow. Adjusts how the reset password flow operates.
reset_password:
jwt_secret: "Générer avec la commande : tr -cd '[:alnum:]' < /dev/urandom | fold -w 64 | head -n 1 | tr -d '\n' ; echo"
server:
address: 'tcp://127.0.0.1:9091/'
disable_healthcheck: false
tls:
key: ""
certificate: ""
## Server Endpoints configuration.
## This section is considered advanced and it SHOULD NOT be configured unless you've read the relevant documentation.
endpoints:
## Enables the pprof endpoint.
enable_pprof: false
## Enables the expvars endpoint.
enable_expvars: false
log:
level: trace
file_path: '/etc/authelia/authelia.log'
totp:
issuer: rnmkcy.eu
period: 30
skew: 1
##
## WebAuthn Configuration
##
webauthn:
## Désactiver Webauthn.
disable: false
## Ajuster le délai d'interaction pour les dialogues Webauthn.
timeout: 60s
## Le nom d'affichage que le navigateur doit montrer à l'utilisateur lorsqu'il utilise
## Webauthn pour se connecter ou s'enregistrer.
display_name: Authelia
## La préférence de transmission contrôle si nous collectons la déclaration d'attestation,
## y compris l'AAGUID, à partir de l'appareil.
## Les options sont none, indirect, direct.
attestation_conveyance_preference: indirect
## Contrôle si l'utilisateur doit faire un geste ou une action pour confirmer sa présence.
## Les options sont : required, preferred, discouraged.
user_verification: preferred
authentication_backend:
password_reset:
disable: false
refresh_interval: 1m
ldap:
implementation: custom
address: ldap://127.0.0.1:3890
timeout: 5s
start_tls: false
base_dn: dc=rnmkcy,dc=eu
additional_users_dn: ou=people
users_filter: "(&({username_attribute}={input})(objectClass=person))"
additional_groups_dn: ou=groups
groups_filter: "(member={dn})"
user: uid=admin,ou=people,dc=rnmkcy,dc=eu
password: 'Mot_de_passe_LLDAP'
attributes:
mail: 'mail'
username: 'uid'
group_name: 'cn'
display_name: 'displayName'
access_control:
default_policy: deny
rules:
## bypass rule
- domain:
- "auth.rnmkcy.eu"
- "cloud.rnmkcy.eu"
policy: bypass
## catch-all
- domain:
- "calibre.rnmkcy.eu"
- "site.rnmkcy.eu"
policy: one_factor
- domain:
- "cockpit.rnmkcy.eu"
policy: two_factor
session:
secret: 'Générer avec la commande : tr -cd '[:alnum:]' < /dev/urandom | fold -w 64 | head -n 1 | tr -d '\n' ; echo'
name: 'authelia_session'
same_site: 'lax'
inactivity: '45m'
expiration: '12h'
remember_me: '2M'
cookies:
- domain: 'rnmkcy.eu'
authelia_url: 'https://auth.rnmkcy.eu'
default_redirection_url: 'https://rnmkcy.eu'
name: 'authelia_session'
same_site: 'lax'
inactivity: '45m'
expiration: '12h'
remember_me: '1d'
redis:
host: localhost
port: 6379
#password: ""
database_index: 0
maximum_active_connections: 10
minimum_idle_connections: 0
regulation:
max_retries: 3
find_time: 10m
ban_time: 12h
storage:
encryption_key: "Générer avec la commande : tr -cd '[:alnum:]' < /dev/urandom | fold -w 64 | head -n 1 | tr -d '\n' ; echo"
mysql:
address: '127.0.0.1:3306'
database: authelia
username: authelia
password: "Mot_de_passe_base_authelia"
notifier:
smtp:
username: 'yako@xoyize.xyz'
password: 'Mot_de_passe_serveur_messagerie'
sender: 'yako@xoyize.xyz'
address: 'submission://xoyize.xyz:587'Les fichiers de configuration nginx pour authelia
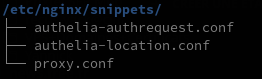
Etendre Réduire authelia-authrequest.conf
## Send a subrequest to Authelia to verify if the user is authenticated and has permission to access the resource.
auth_request /authelia;
## Set the $target_url variable based on the original request.
## Comment this line if you're using nginx without the http_set_misc module.
#set_escape_uri $target_url $scheme://$http_host$request_uri;
## Uncomment this line if you're using NGINX without the http_set_misc module.
set $target_url $scheme://$http_host$request_uri;
## Save the upstream response headers from Authelia to variables.
auth_request_set $user $upstream_http_remote_user;
auth_request_set $groups $upstream_http_remote_groups;
auth_request_set $name $upstream_http_remote_name;
auth_request_set $email $upstream_http_remote_email;
## Inject the response headers from the variables into the request made to the backend.
proxy_set_header Remote-User $user;
proxy_set_header Remote-Groups $groups;
proxy_set_header Remote-Name $name;
proxy_set_header Remote-Email $email;
## If the subreqest returns 200 pass to the backend, if the subrequest returns 401 redirect to the portal.
error_page 401 =302 https://auth.rnmkcy.eu/?rd=$target_url;Etendre Réduire authelia-location.conf
set $upstream_authelia http://127.0.0.1:9091/api/verify;
## Virtual endpoint created by nginx to forward auth requests.
location /authelia {
## Essential Proxy Configuration
internal;
proxy_pass $upstream_authelia;
## Headers
## The headers starting with X-* are required.
proxy_set_header X-Original-URL $scheme://$http_host$request_uri;
proxy_set_header X-Original-Method $request_method;
proxy_set_header X-Forwarded-Method $request_method;
proxy_set_header X-Forwarded-Proto $scheme;
proxy_set_header X-Forwarded-Host $http_host;
proxy_set_header X-Forwarded-Uri $request_uri;
proxy_set_header X-Forwarded-For $remote_addr;
proxy_set_header Content-Length "";
proxy_set_header Connection "";
## Basic Proxy Configuration
proxy_pass_request_body off;
proxy_next_upstream error timeout invalid_header http_500 http_502 http_503; # Timeout if the real server is dead
proxy_redirect http:// $scheme://;
proxy_http_version 1.1;
proxy_cache_bypass $cookie_session;
proxy_no_cache $cookie_session;
proxy_buffers 4 32k;
client_body_buffer_size 128k;
## Advanced Proxy Configuration
send_timeout 5m;
proxy_read_timeout 240;
proxy_send_timeout 240;
proxy_connect_timeout 240;
}Etendre Réduire proxy.conf
## Headers
proxy_set_header Host $host;
proxy_set_header X-Original-URL $scheme://$http_host$request_uri;
proxy_set_header X-Forwarded-Proto $scheme;
proxy_set_header X-Forwarded-Host $http_host;
proxy_set_header X-Forwarded-Uri $request_uri;
proxy_set_header X-Forwarded-Ssl on;
proxy_set_header X-Forwarded-For $remote_addr;
proxy_set_header X-Real-IP $remote_addr;
proxy_set_header Connection "";
## Basic Proxy Configuration
client_body_buffer_size 128k;
proxy_next_upstream error timeout invalid_header http_500 http_502 http_503; ## Timeout if the real server is dead.
proxy_redirect http:// $scheme://;
proxy_http_version 1.1;
proxy_cache_bypass $cookie_session;
proxy_no_cache $cookie_session;
proxy_buffers 64 256k;
## Trusted Proxies Configuration
## Please read the following documentation before configuring this:
## https://www.authelia.com/integration/proxies/nginx/#trusted-proxies
# set_real_ip_from 10.0.0.0/8;
# set_real_ip_from 172.16.0.0/12;
# set_real_ip_from 192.168.0.0/16;
# set_real_ip_from fc00::/7;
real_ip_header X-Forwarded-For;
real_ip_recursive on;
## Advanced Proxy Configuration
send_timeout 5m;
proxy_read_timeout 360;
proxy_send_timeout 360;
proxy_connect_timeout 360;Le sso est en place , il faut modifier les fichiers de configuration nginx des applications concernées
Protection des applications
- Ne pas oublier de recharger nginx après chaque modification des fichiers de configuration :
sudo systemctl reload nginx - Ajouter le site dans le fichier de configuration
/etc/authelia/configuration.ymlentre domain et policy: one_factor de la balise acces_control entre - Relancer le service authelia :
sudo systemctl restart authelia
Etendre Réduire calibre.rnmkcy.eu.conf
server {
listen 80;
listen [::]:80;
server_name calibre.rnmkcy.eu;
# redirect all plain HTTP requests to HTTPS
return 301 https://calibre.rnmkcy.eu$request_uri;
}
server {
# ipv4 listening port/protocol
listen 443 ssl http2;
# ipv6 listening port/protocol
listen [::]:443 ssl http2;
server_name calibre.rnmkcy.eu;
include /etc/nginx/conf.d/security.conf.inc;
include snippets/authelia-location.conf; # Authelia auth endpoint
# connexion nginx fermée si sous domaine inexistant
if ($http_host != "calibre.rnmkcy.eu") {
return 444;
}
location / {
proxy_pass http://127.0.0.1:8083;
include snippets/authelia-authrequest.conf; # Protect this endpoint
}
}Etendre Réduire cockpit.rnmkcy.eu.conf
server {
listen 80;
listen [::]:80;
server_name cockpit.rnmkcy.eu;
return 301 https://cockpit.rnmkcy.eu$request_uri;
}
server {
listen 443 ssl http2;
listen [::]:443 ssl http2;
server_name cockpit.rnmkcy.eu;
include /etc/nginx/conf.d/security.conf.inc;
include snippets/authelia-location.conf; # Authelia auth endpoint
location / {
# Required to proxy the connection to Cockpit
proxy_pass https://127.0.0.1:9090;
proxy_set_header Host $host;
proxy_set_header X-Forwarded-Proto $scheme;
# Required for web sockets to function
proxy_http_version 1.1;
proxy_buffering off;
proxy_set_header Upgrade $http_upgrade;
proxy_set_header Connection "upgrade";
# Pass ETag header from Cockpit to clients.
# See: https://github.com/cockpit-project/cockpit/issues/5239
gzip off;
include snippets/authelia-authrequest.conf; # Protect this endpoint
}
}
location / {
proxy_pass http://127.0.0.1:8083;
include snippets/authelia-authrequest.conf; # Protect this endpoint
}
}Sauvegardes
BorgBackup
Si le dossier scripts existe, créer un alias dans le fichier ~/.bash_aliases
1
alias borglist='$HOME/scripts/borglist.sh'
Exemple d’utilisation
1
borglist -if xoyaz.xyz -d 19/08/2024 -b mount -a /mnt/USB3toNvme -p /sharenfs/pc1/.borg
Création dossier pour extraction
1
2
3
4
5
sudo lvcreate -L 150G -n borgbackup ssd1tovg
sudo mkfs.ext4 /dev/ssd1tovg/borgbackup
sudo mkdir -p /mnt/ssd/borgbackup
sudo mount /dev/ssd1tovg/borgbackup /mnt/ssd/borgbackup
sudo chown $USER:$USER -R /mnt/ssd/borgbackup
UUID blkid |grep "borgbackup"
/dev/mapper/ssd1tovg-borgbackup: UUID="19732f0f-e660-4aa5-9465-7608b54f29b6" BLOCK_SIZE="4096" TYPE="ext4"
Ajout fstab
1
2
# /dev/mapper/ssd1tovg-borgbackup
UUID=19732f0f-e660-4aa5-9465-7608b54f29b6 /mnt/ssd/borgbackup ext4 defaults 0 2
Recharger : sudo systemctl daemon-reload
Les fichiers de paramétrage pour BorgBackup
Liste des serveurs et dossiers qui font l’objet d’une sauvegarde : $HOME/scripts/borglist.serveurs
Ci dessous liste au 12 décembre 2024
1
pc1 media nextcloud e6230 rnmkcy.eu asus-xh51 xoyaz.xyz
Dossier contenant les fichiers descriptifs pour chaque dossier et serveur avec le même nom : /mnt/sharenfs/pc1/.borg
-
<serveur ou dossier>.borgssh-> Clé privée Borg SSH -
<serveur ou dossier>.repository-> Dépôt sur la box -
<serveur ou dossier>.passphrase-> Phrase mot de passe dépôt -
<serveur ou dossier>.exclusions-> Fichiers et dossiers à exclure
ATTENTION les fichiers *.borgssh ont pour droit ‘600’ : chmod 600 *.borgssh
Lien sur PC1 $HOME/Private/.borg -> /mnt/sharenfs/pc1/.borg
Synchronisation des backup borg
Synchronisation des backup borg entre le serveur de stockage (storage box) et le disque USB partagé monté sur la freebox en utilisant systemd timer.
Le script à exécuter en mode su /root/.borg/synchro-backup.sh
1
2
3
4
5
6
7
8
#!/bin/bash
# Synchro BX11 --> FreeUSB2To
servers=("e6230" "xoyize.xyz" "rnmkcy.eu" "asus-xh51" "xoyaz.xyz")
for hote in "${servers[@]}"
do
rsync -avz --delete --rsync-path='rsync' -e 'ssh -p 23 -i /root/.ssh/id_borg_ed25519' u326239@u326239.your-storagebox.de:backup/borg/$hote /mnt/FreeUSB2To/sauvegardes/borgbackup/
done
Script exécutable
1
chmod +x /root/.borg/synchro-backup.sh
Le service /etc/systemd/system/storage-freedisk.service
1
2
3
4
5
6
[Unit]
Description=Rsync storagebox vers FreeUSB2To
[Service]
Type=oneshot
ExecStart=/usr/bin/bash /root/.borg/synchro-backup.sh
Le timer /etc/systemd/system/storage-freedisk.timer
1
2
3
4
5
6
7
8
9
[Unit]
Description=Rsync storagebox vers FreeUSB2To
[Timer]
OnCalendar=*-*-* 04:25
Persistent=true
[Install]
WantedBy=timers.target
Exécution tous les jours à 4h25 du matin
Activez/démarrez le timer, puis vérifiez qu’il est chargé et actif
1
2
3
sudo systemctl enable storage-freedisk.timer
sudo systemctl start storage-freedisk.timer
systemctl status storage-freedisk.timer
Vérifiez qu’il a été démarré en vérifiant s’il apparaît dans la liste des minuteries :
1
systemctl list-timers
Développement
Go + Node
-
Installer la dernière version de Go
- go version go1.21.4 linux/amd64
-
Installer Node.js
- Now using node v20.10.0 (npm v10.2.3)
Creating default alias: default -> 20.10.0 (-> v20.10.0)
- Now using node v20.10.0 (npm v10.2.3)
Php composer
Composer est un outil de gestion de dépendance populaire pour PHP, créé principalement pour faciliter l’installation et les mises à jour pour les dépendances du projet.
1
2
3
php -r "copy('https://getcomposer.org/installer', 'composer-setup.php');"
sudo php composer-setup.php --install-dir=/usr/local/bin --filename=composer
sudo chmod +x /usr/local/bin/composer
wg-webui-fr
Gestion clients et serveur wireguard (go+nodejs)
Dossier : ~/wg-webui-fr/
Créer le service wgweb
Créer le service /etc/systemd/system/wgweb.service
1
2
3
4
5
6
7
8
9
10
11
12
13
14
15
16
[Unit]
Description=Wireguard web
After=network.target
[Service]
Type=simple
Restart=on-failure
RestartSec=10
WorkingDirectory=/opt/appwg
ExecStart=/opt/appwg/wg-ui
[Install]
WantedBy=multi-user.target
Environnement fichier .env
Modifier le fichier environnement ~/wg-webui-fr/.env
1
2
3
4
5
6
7
8
9
10
11
12
SERVER=127.0.0.1
PORT=8090
GIN_MODE=debug
WG_CONF_DIR=/opt/appwg/wireguard
WG_INTERFACE_NAME=wg0.conf
SMTP_HOST=127.0.0.1
SMTP_PORT=587
SMTP_USERNAME=""
SMTP_PASSWORD=""
SMTP_FROM="wg-web-ui <wg-web-ui@wg-web-ui.xyz>"
ATTENTION: Pour exécuter l'application un fichier wg0.conf doit être présent dans le dossier ./wireguard
Première construction wg-webui-fr
Pour éviter le message suivant lors de la première construction
1
2
core/client.go:13:2: no required module provides package gopkg.in/gomail.v2; to add it:
go get gopkg.in/gomail.v2
Exécuter
1
go get gopkg.in/gomail.v2
Exécuter les commandes suivantes
1
2
3
4
5
6
7
8
9
10
11
12
13
cd ~/wg-webui-fr/
go mod tidy
go build -o wg-ui main.go
cd ui
export NODE_OPTIONS=--openssl-legacy-provider
export VUE_APP_API_BASE_URL=http://localhost:8080/api/v1.0
npm install
npm run build
cd ~/wg-webui-fr/
sudo mkdir -p /opt/appwg/ui
sudo cp ~/wg-webui-fr/wg-ui /opt/appwg
sudo cp -r ~/wg-webui-fr/ui/dist /opt/appwg/ui/
sudo cp ~/wg-webui-fr/.env /opt/appwg/
Premier lancement du service et activation
1
2
sudo systemctl daemon-reload
sudo systemctl enable wgweb.service --now
Wireguard ui est accessible sur localhost:8080
Pour une mise è jour wg-webui-fr
Exécuter les commandes suivantes
1
2
3
4
5
6
7
8
9
10
11
12
13
#sudo systemctl stop wgweb.service
cd ~/wg-webui-fr/
go build -o wg-ui main.go
cd ui
export NODE_OPTIONS=--openssl-legacy-provider
export VUE_APP_API_BASE_URL=http://localhost:8080/api/v1.0
npm install
npm run build
cp ~/wg-webui-fr/wg-ui /opt/appwg
cp -r ~/wg-webui-fr/ui/dist /opt/appwg/ui/
#sudo cp ~/wg-webui-fr/wg-ui /opt/appwg
#sudo cp -r ~/wg-webui-fr/ui/dist /opt/appwg/ui/
#sudo systemctl start wgweb.service
Tests
1
ssh -L 9500:localhost:8090 leno@192.168.0.215 -p 55215 -i /home/yann/.ssh/lenovo-ed25519
Radiolise (INACTIF)
https://www.radio-browser.info/
Radio-li-se
Prérequis: Node.js (LTS recommandé)
Installer Radiolise à l’échelle globale
1
npm install -g radiolise
Puis démarrez le serveur à chaque fois en tapant simplement
1
radiolise
Démarrage auto de l’application node
Comment mettre en place une application Node.js pour la production
Nous allons installer PM2, un gestionnaire de processus pour les applications Node.js. PM2 permet de démoniser les applications afin qu’elles s’exécutent en arrière-plan comme un service.
Utilisez npm pour installer la dernière version de PM2 sur votre serveur :
1
npm install pm2@latest -g
Commençons par utiliser la commande pm2 start1 pour exécuter votre application, radiolise, en arrière-plan :
1
pm2 start radiolise
Cela ajoute également votre demande à la liste de processus de PM2, qui est produite chaque fois que vous lancez une demande
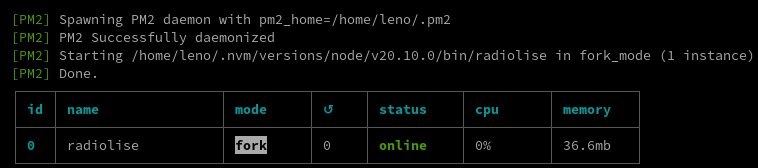
Comme indiqué ci-dessus, PM2 attribue automatiquement un nom d’application (basé sur le nom de fichier, sans l’extension .js) et un identifiant PM2. PM2 conserve également d’autres informations, telles que le PID du processus, son état actuel et l’utilisation de la mémoire.
Les applications qui tournent sous PM2 seront redémarrées automatiquement si l’application crashe ou est arrêtée, mais nous pouvons prendre une mesure supplémentaire pour que l’application soit lancée au démarrage du système en utilisant la sous-commande startup. Cette sous-commande génère et configure un script de démarrage pour lancer PM2 et ses processus gérés aux démarrages du serveur
1
pm2 startup systemd
La dernière ligne de la sortie résultante comprendra une commande à exécuter avec les privilèges de superuser afin de configurer PM2 pour qu’il démarre au démarrage
1
2
3
[PM2] Init System found: systemd
[PM2] To setup the Startup Script, copy/paste the following command:
sudo env PATH=$PATH:/home/leno/.nvm/versions/node/v20.10.0/bin /home/leno/.nvm/versions/node/v20.10.0/lib/node_modules/pm2/bin/pm2 startup systemd -u leno --hp /home/leno
Exécutez la commande à partir de la sortie
1
sudo env PATH=$PATH:/home/leno/.nvm/versions/node/v20.10.0/bin /home/leno/.nvm/versions/node/v20.10.0/lib/node_modules/pm2/bin/pm2 startup systemd -u leno --hp /home/leno
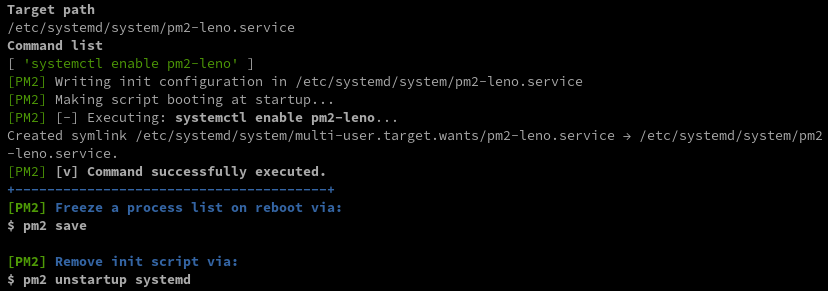
Vous avez maintenant créé une unité systemd qui exécute pm2 pour votre utilisateur au démarrage. Cette instance pm2, à son tour, lance radiolise
Démarrer le service avec systemctl:
1
sudo systemctl start pm2-leno
Un redémarrage de la machine est souhaitable
1
systemctl status pm2-leno
1
2
3
4
5
6
7
8
9
10
11
12
13
14
15
16
17
18
19
20
21
22
● pm2-leno.service - PM2 process manager
Loaded: loaded (/etc/systemd/system/pm2-leno.service; enabled; preset: enabled)
Active: active (running) since Fri 2024-01-05 18:47:50 CET; 1min 6s ago
Docs: https://pm2.keymetrics.io/
Process: 941 ExecStart=/home/leno/.nvm/versions/node/v20.10.0/lib/node_modules/pm2/bin/pm2 resurrect (code=exited, status=0/SUCCESS)
Main PID: 1368 (PM2 v5.3.0: God)
Tasks: 15 (limit: 14162)
Memory: 71.5M
CPU: 6.445s
CGroup: /system.slice/pm2-leno.service
└─1368 "PM2 v5.3.0: God Daemon (/home/leno/.pm2)"
janv. 05 18:47:50 rnmkcy.eu pm2[941]: [PM2] PM2 Successfully daemonized
janv. 05 18:47:50 rnmkcy.eu pm2[941]: [PM2] Resurrecting
janv. 05 18:47:50 rnmkcy.eu pm2[941]: [PM2] Restoring processes located in /home/leno/.pm2/dump.pm2
janv. 05 18:47:50 rnmkcy.eu pm2[941]: [PM2] Process /home/leno/.nvm/versions/node/v20.10.0/bin/radiolise restored
janv. 05 18:47:50 rnmkcy.eu pm2[941]: ┌────┬──────────────┬─────────────┬─────────┬─────────┬──────────┬────────┬──────┬───────────┬──────────┬──────────┬──────────┬──────────┐
janv. 05 18:47:50 rnmkcy.eu pm2[941]: │ id │ name │ namespace │ version │ mode │ pid │ uptime │ ↺ │ status │ cpu │ mem │ user │ watching │
janv. 05 18:47:50 rnmkcy.eu pm2[941]: ├────┼──────────────┼─────────────┼─────────┼─────────┼──────────┼────────┼──────┼───────────┼──────────┼──────────┼──────────┼──────────┤
janv. 05 18:47:50 rnmkcy.eu pm2[941]: │ 0 │ radiolise │ default │ 0.39.6 │ fork │ 1436 │ 0s │ 0 │ online │ 0% │ 30.0mb │ leno │ disabled │
janv. 05 18:47:50 rnmkcy.eu pm2[941]: └────┴──────────────┴─────────────┴─────────┴─────────┴──────────┴────────┴──────┴───────────┴──────────┴──────────┴──────────┴──────────┘
janv. 05 18:47:50 rnmkcy.eu systemd[1]: Started pm2-leno.service - PM2 process manager.
Votre application fonctionne et écoute sur localhost, mais vous devez mettre en place un moyen pour que vos utilisateurs y accèdent. Pour cela, nous allons mettre en place le serveur web Nginx comme proxy inverse.
1
/etc/nginx/conf.d/radio.rnmkcy.eu.conf
1
2
3
4
5
6
7
8
9
10
11
12
13
14
15
16
17
18
19
20
21
22
23
24
server {
listen 80;
listen [::]:80;
server_name radio.rnmkcy.eu;
return 301 https://radio.rnmkcy.eu$request_uri;
}
server {
listen 443 ssl http2;
listen [::]:443 ssl http2;
server_name radio.rnmkcy.eu;
include /etc/nginx/conf.d/security.conf.inc;
location / {
proxy_pass http://127.0.0.1:56225;
proxy_http_version 1.1;
proxy_set_header Upgrade $http_upgrade;
proxy_set_header Connection 'upgrade';
proxy_set_header Host $host;
proxy_cache_bypass $http_upgrade;
}
}
Vérifier et recharger nginx
1
sudo nginx -t && sudo systemctl reload nginx
webauthn (NON INSTALLE)
standard pour l’authentification sur le web utilisant la cryptographie asymétrique
Dossier de travail /sharenfs/rnmkcy/ avec les droits utilisateur (leno ID=1000)
1
cd /sharenfs/rnmkcy/
Cloner le git
1
git clone https://github.com/davidearl/webauthn.git
accessible en lecture/écriture sur pc1 ~/media/sharenfs/rnmkcy/webauthn/
Cela nécessite
- Bibliothèque PHP CBOR: peut être installé en utilisant l’installation de compositeur dans le répertoire du projet
- phpseclib, ditto
- Un récent openssl inclus dans PHP (openssl_vérify en particulier)
- PHP 5.6.1 ou ultérieur (de préférence PHP 7.4 ou 8.1; non testé avec PHP 8.2, qui a quelques modifications significatives aux déclarations de propriétés)
Exemple
Le code d’exemple est en direct à https://webauthn.davidearl.uk
Pour accueillir l’exemple vous-même,
- placer le code dans la hiérarchie des documents pour votre serveur (par exemple https://example.com/webauthn),
- installer CBOR etc. en utilisant l’installation de composer
- Visiter url https://exemple.com/webauthn/exemple
Si vous mettez tous les répertoires dans webauthn à votre racine de document et ajoutez un index. php comme suit, vous pouvez l’exécuter au niveau supérieur comme par exemple. https://exemple.com (utilisez votre nom de domaine, évidemment).
1
<?php chdir('exemple'); include_once('index.php');
Installer PHP 8.1
1
sudo apt install php8.1 php8.1-fpm
Créer un pool php spécifique
1
cp /etc/php/8.1/fpm/pool.d/www.conf /etc/php/8.1/fpm/pool.d/webauth.conf
Modifier le fichier /etc/php/8.1/fpm/pool.d/webauth.conf
1
2
3
4
5
6
7
8
9
10
11
12
[webauth]
; Default Values: The user is set to master process running user by default.
; If the group is not set, the user's group is used.
user = leno
group = leno
; Default Values: The user is set to master process running user by default.
; If the group is not set, the user's group is used.
user = leno
group = leno
; Note: This value is mandatory.
listen = /run/php/php8.1-fpm-webauth.sock
Relancer php-fpm
1
sudo systemctl restart php8.1-fpm
Installer CBOR et phpseclib
1
composer install
1
2
3
4
5
6
7
8
9
10
11
12
13
Installing dependencies from lock file (including require-dev)
Verifying lock file contents can be installed on current platform.
Package operations: 5 installs, 0 updates, 0 removals
- Downloading atoum/atoum (4.1)
- Downloading phpseclib/phpseclib (3.0.17)
- Installing 2tvenom/cborencode (1.0.2): Extracting archive
- Installing atoum/atoum (4.1): Extracting archive
- Installing paragonie/random_compat (v9.99.100): Extracting archive
- Installing paragonie/constant_time_encoding (v2.6.3): Extracting archive
- Installing phpseclib/phpseclib (3.0.17): Extracting archive
Generating autoload files
1 package you are using is looking for funding.
Use the `composer fund` command to find out more!
Le fichier nginx /etc/nginx/conf.d/webauth.rnmkcy.eu.conf
1
2
3
4
5
6
7
8
9
10
11
12
13
14
15
16
17
18
19
20
21
22
23
24
25
26
27
server {
listen 443 ssl http2;
listen [::]:443 ssl http2;
server_name webauth.rnmkcy.eu;
include /etc/nginx/conf.d/security.conf.inc;
root /sharenfs/rnmkcy/webauthn/;
location / {
index index.php;
}
location ~ \.php(?:$|/) {
include fastcgi_params;
fastcgi_param SCRIPT_FILENAME $request_filename;
fastcgi_split_path_info ^(.+\.php)(/.+)$;
fastcgi_param HTTPS on;
fastcgi_param modHeadersAvailable true; # Avoid sending the security headers twice
fastcgi_param front_controller_active true; # Enable pretty urls
fastcgi_param HTTP_ACCEPT_ENCODING ""; # Disable encoding of nextcloud response to inject ynh scripts
fastcgi_pass unix:/var/run/php/php8.1-fpm-webauth.sock;
fastcgi_intercept_errors on;
fastcgi_request_buffering off;
}
}
Vérifier et recharger nginx
1
sudo nginx -t && sudo systemctl reload nginx
Créer un fichier /sharenfs/rnmkcy/webauthn/index.php
Etendre Réduire index.php
<?php
/*
If you put the whole webauthn directory in the www document root and put an index.php in there
which just includes this file, it should then work. Alternatively set it as a link to this file.
*/
//require_once(dirname(__DIR__).'vendor/autoload.php');
require_once('vendor/autoload.php');
/* In this example, the user database is simply a directory of json files
named by their username (urlencoded so there are no weird characters
in the file names). For simplicity, it's in the HTML tree so someone
could look at it - you really, really don't want to do this for a
live system
*/
define('USER_DATABASE', '.users');
if (! file_exists(USER_DATABASE)) {
if (! @mkdir(USER_DATABASE)) {
error_log(sprintf('Cannot create user database directory - is the/ directory writable by the web server? If not: "mkdir %s; chmod 777 %s"', USER_DATABASE, USER_DATABASE));
die(sprintf("cannot create %s - see error log", USER_DATABASE));
}
}
session_start();
function oops($s){
http_response_code(400);
echo "{$s}\n";
exit;
}
function userpath($username){
$username = str_replace('.', '%2E', $username);
return sprintf('%s/%s.json', USER_DATABASE, urlencode($username));
}
function getuser($username){
$user = @file_get_contents(userpath($username));
if (empty($user)) { oops('user not found'); }
$user = json_decode($user);
if (empty($user)) { oops('user not json decoded'); }
return $user;
}
function saveuser($user){
file_put_contents(userpath($user->name), json_encode($user));
}
/* A post is an ajax request, otherwise display the page */
if (! empty($_POST)) {
try {
$webauthn = new \Davidearl\WebAuthn\WebAuthn($_SERVER['HTTP_HOST']);
switch(TRUE){
case isset($_POST['registerusername']):
/* initiate the registration */
$username = $_POST['registerusername'];
$crossplatform = ! empty($_POST['crossplatform']) && $_POST['crossplatform'] == 'Yes';
$userid = md5(time() . '-'. rand(1,1000000000));
if (file_exists(userpath($username))) {
oops("user '{$username}' already exists");
}
/* Create a new user in the database. In principle, you can store more
than one key in the user's webauthnkeys,
but you'd probably do that from a user profile page rather than initial
registration. The procedure is the same, just don't cancel existing
keys like this.*/
$user = (object)['name'=> $username,
'id'=> $userid,
'webauthnkeys' => $webauthn->cancel()];
saveuser($user);
$_SESSION['username'] = $username;
$j = ['challenge' => $webauthn->prepareChallengeForRegistration($username, $userid, $crossplatform)];
break;
case isset($_POST['register']):
/* complete the registration */
if (empty($_SESSION['username'])) { oops('username not set'); }
$user = getuser($_SESSION['username']);
/* The heart of the matter */
$user->webauthnkeys = $webauthn->register($_POST['register'], $user->webauthnkeys);
/* Save the result to enable a challenge to be raised agains this
newly created key in order to log in */
saveuser($user);
$j = 'ok';
break;
case isset($_POST['loginusername']):
/* initiate the login */
$username = $_POST['loginusername'];
$user = getuser($username);
$_SESSION['loginname'] = $user->name;
/* note: that will emit an error if username does not exist. That's not
good practice for a live system, as you don't want to have a way for
people to interrogate your user database for existence */
$j['challenge'] = $webauthn->prepareForLogin($user->webauthnkeys);
/* Save user again, which sets server state to include the challenge expected */
saveuser($user);
break;
case isset($_POST['login']):
/* authenticate the login */
if (empty($_SESSION['loginname'])) { oops('username not set'); }
$user = getuser($_SESSION['loginname']);
if (! $webauthn->authenticate($_POST['login'], $user->webauthnkeys)) {
http_response_code(401);
echo 'failed to authenticate with that key';
exit;
}
/* Save user again, which sets server state to include the challenge expected */
saveuser($user);
$j = 'ok';
break;
default:
http_response_code(400);
echo "unrecognized POST\n";
break;
}
} catch(Exception $ex) {
oops($ex->getMessage());
}
header('Content-type: application/json');
echo json_encode($j);
exit;
}
?>
<!DOCTYPE/>
/>
<head>
<title>webauthn php server side example and test</title>
<style>
body {
font-family: Verdana, sans-serif;
}
h1 {
font-size: 1.5em;
}
h2 {
font-size: 1.2em;
}
.ccontent {
display: flex;
flex-wrap: wrap;
margin: 10px;
}
.cbox {
width: 100%;
max-width: 480px;
min-height: 150px;
border: 1px solid black;
padding: 10px;
margin: 10px;
line-height: 2;
}
.cdokey {
display: none;
background-color: orange;
color: white;
font-weight: bold;
margin: 10px 0;
padding: 10px;
}
.cerror {
display: none;
background-color: tomato;
color: white;
padding: 10px;
font-weight: bold;
}
.cdone {
display: none;
background-color: darkgreen;
color: white;
padding: 10px;
font-weight: bold;
}
.chint {
max-width: 450px;
margin-left: 2em;
}
</style>
</head>
<body>
<h1>webauthn php server side example and test</h1>
<ul>
<li><a href='https://github.com/davidearl/webauthn'>GitHub</a>
</ul>
<div class='cerror'></div>
<div class='cdone'></div>
<div class='ccontent'>
<div class='cbox' id='iregister'>
<h2>User Registration</h2>
<form id='iregisterform' action='/' method='POST'>
<label> enter a new username (eg email address): <input type='text' name='registerusername'></label><br>
cross-platform?<sup>*</sup> <select name='cp'>
<option value=''>(choose one)</option>
<option>No</option>
<option>Yes</option>
</select><br>
<input type='submit' value='Submit'><br>
</form>
<div class='cdokey' id='iregisterdokey'>
Do your thing: press button on key, swipe fingerprint or whatever
</div>
</div>
<div class='cbox' id='ilogin'>
<h2>User Login</h2>
<form id='iloginform' action='/' method='POST'>
<label> enter existing username: <input type='text' name='loginusername'></label><br>
<input type='submit' value='Submit'>
</form>
<div class='cdokey' id='ilogindokey'>
Do your thing: press button on key, swipe fingerprint or whatever
</div>
</div>
</div>
<p class='chint'>* Use cross-platform 'Yes' when you have a removable device, like
a Yubico key, which you would want to use to login on different
computers; say 'No' when your device is attached to the computer (in
that case in Windows 10 1903 release, your login
is linked to Windows Hello and you can use any device it supports
whether registered with that device or not, but only on that
computer). The choice affects which device(s) are offered by the
browser and/or computer security system.</p>
<script src='src/webauthnregister.js'></script>
<script src='src/webauthnauthenticate.js'></script>
<!-- only for the example, the webauthn js does not need jquery itself -->
<script src='https://code.jquery.com/jquery-3.3.1.min.js'></script>
<script>
$(function(){
$('#iregisterform').submit(function(ev){
var self = $(this);
ev.preventDefault();
var cp = $('select[name=cp]').val();
if (cp == "") {
$('.cerror').show().text("Please choose cross-platform setting - see note below about what this means");
return;
}
$('.cerror').empty().hide();
$.ajax({url: '/',
method: 'POST',
data: {registerusername: self.find('[name=registerusername]').val(), crossplatform: cp},
dataType: 'json',
success: function(j){
$('#iregisterform,#iregisterdokey').toggle();
/* activate the key and get the response */
webauthnRegister(j.challenge, function(success, info){
if (success) {
$.ajax({url: '/',
method: 'POST',
data: {register: info},
dataType: 'json',
success: function(j){
$('#iregisterform,#iregisterdokey').toggle();
$('.cdone').text("registration completed successfully").show();
setTimeout(function(){ $('.cdone').hide(300); }, 2000);
},
error: function(xhr, status, error){
$('.cerror').text("registration failed: "+error+": "+xhr.responseText).show();
}
});
} else {
$('.cerror').text(info).show();
}
});
},
error: function(xhr, status, error){
$('#iregisterform').show();
$('#iregisterdokey').hide();
$('.cerror').text("couldn't initiate registration: "+error+": "+xhr.responseText).show();
}
});
});
$('#iloginform').submit(function(ev){
var self = $(this);
ev.preventDefault();
$('.cerror').empty().hide();
$.ajax({url: '/',
method: 'POST',
data: {loginusername: self.find('[name=loginusername]').val()},
dataType: 'json',
success: function(j){
$('#iloginform,#ilogindokey').toggle();
/* activate the key and get the response */
webauthnAuthenticate(j.challenge, function(success, info){
if (success) {
$.ajax({url: '/',
method: 'POST',
data: {login: info},
dataType: 'json',
success: function(j){
$('#iloginform,#ilogindokey').toggle();
$('.cdone').text("login completed successfully").show();
setTimeout(function(){ $('.cdone').hide(300); }, 2000);
},
error: function(xhr, status, error){
$('.cerror').text("login failed: "+error+": "+xhr.responseText).show();
}
});
} else {
$('.cerror').text(info).show();
}
});
},
error: function(xhr, status, error){
$('#iloginform').show();
$('#ilogindokey').hide();
$('.cerror').text("couldn't initiate login: "+error+": "+xhr.responseText).show();
}
});
});
});
</script>
</body>
</>Virtualisation KVM
Installer KVM sur le serveur
Installer KVM (Kernel Virtual Machine) sur un serveur
Modifier le pool par défaut après avoir ajouté un disque /srv/kvm
Créer un dossier kvm
1
sudo mkdir -p /srv/kvm/pool
Pour indiquer le chemin d’accès au pool de stockage pour le type (Dir), nous avons besoin du dernier argument, “target”, bien que nous puissions omettre les autres arguments en utilisant le symbole “-“.
1
sudo virsh pool-define-as --name poolk --type dir --target /srv/kvm/libvirt/images
pool poolk défini
Utilisez la commande suivante pour inspecter chaque pool de stockage que vous avez dans l’environnement
1
sudo virsh pool-list --all
1
2
3
4
5
Nom État Démarrage automatique
--------------------------------------------
boot actif Oui
images actif Oui
poolk inactif no
Démarrer le pool de stockage et le charger lors du démarrage
1
sudo virsh pool-autostart poolk
Le pool poolk démarrera automatiquement
Supprimer les pool boot, images et default
1
2
3
4
sudo virsh pool-destroy boot # Pool boot détruit
sudo virsh pool-undefine boot # Le pool boot a été supprimé
sudo virsh pool-destroy images # Pool images détruit
sudo virsh pool-undefine images # Le pool images a été supprimé
Vérification
1
sudo virsh pool-list --all
1
2
3
Nom État Démarrage automatique
----------------------------------------
poolk actif Oui
Pour manipuler les “pool” en xml
Edition : virsh pool-edit poolk
Edition : virsh pool-dumpxml poolk
Créer un second pool nommé “poolb” dossier /srv/kvm/libvirt/boot
Liste des “pool” : sudo virsh pool-list --all
1
2
3
4
Nom État Démarrage automatique
----------------------------------------
poolb actif Oui # /srv/kvm/libvirt/boot
poolk actif Oui # /srv/kvm/libvirt/images
Clavier étendu
Pour avoir un clavier étendu sur la VM
Passing keyboard/mouse via Evdev
D’abord, trouvez vos périphériques clavier et souris dans /dev/input/by-id/. Seuls les appareils avec événement en leur nom sont valides: ls /dev/input/by-id/
Sur PC1 : usb-Logitech_USB_Receiver-if01-event-mouse et usb-Kingston_HyperX_Alloy_Origins-if02-event-kbd
On va juste ajouter le clavier cr la souris ne pose pas de problème
Ajouter le clavier à votre configuration (exemple VM EndeavourOS) dans <devices>:
1
sudo virsh edit EndeavourOS
1
2
3
<input type='evdev'>
<source dev='/dev/input/by-id/usb-Kingston_HyperX_Alloy_Origins-if02-event-kbd' grab='all' repeat='on' grabToggle='ctrl-ctrl'/>
</input>
Vous pouvez également envisager de passer des entrées PS/2 à Virtio dans vos configurations.
1
<input type='keyboard' bus='virtio'/>
Les dispositifs d’entrée virtio ne seront pas utilisés jusqu’à ce que les pilotes invités soient installés. QEMU continuera d’envoyer des événements clés aux appareils PS2 jusqu’à ce qu’il détecte l’initialisation du pilote d’entrée virtio. Notez que les appareils PS2 ne peuvent pas être enlevés car ils sont une fonction interne des chipsets Q35/440FX émulés.
Réseau NAT IPV6
NAT libvirt pour accepter IPV6
Une modification obligatoire sous peine d’une erreur réseau
Vérifiez la configuration de l’hôte : l’interface eno1 a des routes IPv6 autoconfigurées par le noyau et l’activation de la redirection sans que accept_ra soit fixé à 2 entraînera le vidage de ces routes par le noyau, ce qui brisera le réseau.
Fixer accept_ra à 2
1
sysctl -q -e -w net.ipv6.conf.eno1.accept_ra=2
Ajout au fichier sysctl.conf (debian)
1
echo "net.ipv6.conf.eno1.accept_ra=2" | sudo tee -a /etc/sysctl.conf
créez un fichier XML appelé network-nat.xml :
1
nano network-nat.xml
Ajoutez les lignes suivantes :
1
2
3
4
5
6
7
8
9
10
11
12
13
14
15
16
17
18
<network>
<name>network-nat</name>
<forward mode='nat'>
<nat ipv6='yes'>
<port start='1024' end='65535'/>
</nat>
</forward>
<bridge name='virbr1' stp='on' delay='0'/>
<mac address='52:54:00:84:e0:df'/>
<domain name='network-nat'/>
<ip address='192.168.100.1' netmask='255.255.255.0'>
<dhcp>
<range start='192.168.100.128' end='192.168.100.254'/>
</dhcp>
</ip>
<ip family='ipv6' address='2a01:e0a:9c8:2081::' prefix='64'>
</ip>
</network>
Exécutez les commandes suivantes pour démarrer le pont nouvellement créé et en faire le pont par défaut pour les VM :
1
2
3
sudo virsh net-define network-nat.xml
sudo virsh net-start network-nat
sudo virsh net-autostart network-nat
Pour vérifier s’il est actif et démarré

Structure libvirt
1
2
3
4
5
6
7
8
9
10
11
12
13
14
15
16
17
18
19
20
21
22
23
24
25
26
27
28
29
30
31
32
33
34
35
36
37
38
39
40
41
42
43
44
45
46
# Les configurations xml
root@rnmkcy:/home/leno# tree -L 2 /etc/libvirt/qemu
/etc/libvirt/qemu
├── alpine-vm.xml
├── autostart
│ ├── alpine-vm.xml -> /etc/libvirt/qemu/alpine-vm.xml
│ ├── vm-debian12.xml -> /etc/libvirt/qemu/vm-debian12.xml
│ └── vm-ouestline.xml -> /etc/libvirt/qemu/vm-ouestline.xml
├── bookworm01.xml
├── debsrv01.xml
├── leno-alpine-vm01.xml
├── lenoyuno.xml
├── miniflux.xml
├── networks
│ ├── autostart
│ ├── default.xml
│ └── host-bridge.xml
├── ttrss.xml
├── vm-debian12.xml
└── vm-ouestline.xml
# Les images iso et qcow2
root@rnmkcy:/home/leno# tree -L 3 /srv/kvm/
/srv/kvm/
└── libvirt
├── boot
│ ├── alpine-standard-3.20.2-x86_64.iso
│ ├── archlinux-2024.09.01-x86_64.iso
│ └── debian-12.6.0-amd64-netinst.iso
└── images
├── alpine-ouest
├── alpine-vm01.qcow2
├── alpine-vm.qcow2
├── alpine-vm.qcow2.sav
├── bookworm01.qcow2
├── debian-10-onlyoffice.qcow2
├── debian-12-authelia.qcow2
├── debian-12-lldap.qcow2
├── debian-12-nocloud-amd64.qcow2
├── lenoyuno.qcow2
├── miniflux.qcow2
├── ttrss.qcow2
├── vm-bookworm_sav.qcow2
├── vm-debian12.qcow2
└── vm-ouestline.qcow2
VM - Alpine ouestline
Alpine Linux dans un environnement virtuel KVM Lenovo
VM - vm-debian12
Lenovo KVM - Machine virtuelle debian 12 (vm-debian12)
Arrêt VM avant reboot Hôte
Il faut arrêter proprement toutes les machines virtuelles en cours d’exécution avant de stopper ou redémarrer la machine hôte”
Script qui s’exécute avant arrêt/redémarrage machine hôte
1
nano /home/leno/run_before_shutdown.sh
1
2
3
4
5
6
7
#!/bin/bash
# Identifiants machines virtuelles en cours d'exécution
while read vmid
do
virsh shutdown $vmid
done <<< "$(virsh list --id --state-running)"
# Le triple chevron <<< permet de prendre la sortie de commande en entrée de boucle.
Droits en exécution
1
chmod +x /home/leno/run_before_shutdown.sh
Le service systemd
1
nano /etc/systemd/system/run-before-shutdown.service
1
2
3
4
5
6
7
8
9
10
11
12
[Unit]
Description=shutdown vm
DefaultDependencies=no
Before=shutdown.target
[Service]
Type=oneshot
ExecStart=/home/leno/run_before_shutdown.sh
TimeoutStartSec=0
[Install]
WantedBy=shutdown.target
Rechargement et activation service
1
2
systemctl daemon-reload
systemctl enable run-before-shutdown.service
Sécurité
Lynis
Lynis pour auditer et renforcer la sécurité des systèmes basés sur Linux
Rkhunter
Maintenance
Liaison SSH Yunohost xoyaz.xyz
Créer une liaison SSH avec le serveur xoyaz.xyz qui n’accepte que les connexions avec clé sur le port 55030
- Serveur distant: 37.60.230.30 (xoyaz.xyz)
- Utilisateur: yani
- Port : 55030
Générer une paire de clé curve25519-sha256 (ECDH avec Curve25519 et SHA2) pour une liaison SSH avec le serveur.
1
ssh-keygen -t ed25519 -o -a 100 -f ~/.ssh/xoyaz_xyz
La clé publique ~/.ssh/xoyaz_xyz.pub
1
ssh-ed25519 AAAAC3NzaC1lZDI1NTE5AAAAIFzVuzJY77wG5oTeatGgNOLmySGbRDNvj/PWLeQK+X9B leno@rnmkcy.eu
Depuis un poste ayant accès au serveur xoyaz.xyz , se connecter et ajouter la clé publique en fin du fichier ~/.ssh/authorized_keys
1
echo "ssh-ed25519 AAAAC3NzaC1lZDI1NTE5AAAAIFzVuzJY77wG5oTeatGgNOLmySGbRDNvj/PWLeQK+X9B leno@rnmkcy.eu" >> $HOME/.ssh/authorized_keys
Depuis un terminal du serveur rnmkcy.eu, première connexion au serveur xoyaz.xyz via ssh
1
ssh -i ~/.ssh/xoyaz_xyz -p 55030 yani@xoyaz.xyz
1
2
3
4
5
6
7
8
9
10
11
12
13
14
15
16
17
18
19
20
The authenticity of host '[xoyaz.xyz]:55030 ([37.60.230.30]:55030)' can't be established.
ED25519 key fingerprint is SHA256:5MZJ+RVEpv92P5BbBtfQrYr2+brt6HyD+OWE8qv8cek.
This key is not known by any other names.
Are you sure you want to continue connecting (yes/no/[fingerprint])? yes
Warning: Permanently added '[xoyaz.xyz]:55030' (ED25519) to the list of known hosts.
Linux xoyaz.xyz 6.1.0-26-amd64 #1 SMP PREEMPT_DYNAMIC Debian 6.1.112-1 (2024-09-30) x86_64
__ __ _ _
\ \ / /_ _ _ _ ___ | |_ ___ ___| |_
\ V /| || || ' \ / _ \| ' \ / _ \(_-<| _|
|_| \_,_||_||_|\___/|_||_|\___//__/ \__|
__ __ ___ _ _ __ _ ___ __ __ _ _ ___
\ \ // _ \| || |/ _` ||_ / _ \ \ /| || ||_ /
/_\_\\___/ \_, |\__,_|/__|(_)/_\_\ \_, |/__|
|__/ |__/
____ ____ __ __ ___ ____ __ ____ __
|__ /|__ | / / / \ |_ )|__ / / \ |__ / / \
|_ \ / /_ / _ \| () |_ / / |_ \| () |_ |_ \| () |
|___/ /_/(_)\___/ \__/(_)/___||___/ \__/(_)|___/ \__/
You have no mail.
Last login: Sat Nov 9 08:31:18 2024 from 193.32.126.230
Si l’on veut un accès SSH par IP
1
ssh -i ~/.ssh/xoyaz_xyz -p 55030 yani@37.60.230.30
1
2
3
4
5
6
7
8
9
10
11
12
13
14
15
16
17
18
19
20
21
The authenticity of host '[37.60.230.30]:55030 ([37.60.230.30]:55030)' can't be established.
ED25519 key fingerprint is SHA256:5MZJ+RVEpv92P5BbBtfQrYr2+brt6HyD+OWE8qv8cek.
This host key is known by the following other names/addresses:
~/.ssh/known_hosts:27: [xoyaz.xyz]:55030
Are you sure you want to continue connecting (yes/no/[fingerprint])? yes
Warning: Permanently added '[37.60.230.30]:55030' (ED25519) to the list of known hosts.
Linux xoyaz.xyz 6.1.0-26-amd64 #1 SMP PREEMPT_DYNAMIC Debian 6.1.112-1 (2024-09-30) x86_64
__ __ _ _
\ \ / /_ _ _ _ ___ | |_ ___ ___| |_
\ V /| || || ' \ / _ \| ' \ / _ \(_-<| _|
|_| \_,_||_||_|\___/|_||_|\___//__/ \__|
__ __ ___ _ _ __ _ ___ __ __ _ _ ___
\ \ // _ \| || |/ _` ||_ / _ \ \ /| || ||_ /
/_\_\\___/ \_, |\__,_|/__|(_)/_\_\ \_, |/__|
|__/ |__/
____ ____ __ __ ___ ____ __ ____ __
|__ /|__ | / / / \ |_ )|__ / / \ |__ / / \
|_ \ / /_ / _ \| () |_ / / |_ \| () |_ |_ \| () |
|___/ /_/(_)\___/ \__/(_)/___||___/ \__/(_)|___/ \__/
You have no mail.
Last login: Sat Nov 9 08:39:47 2024 from 82.64.18.243
Gestionnaire liaison SSH (sshm)
Utiliser “sshm” pour gérer les liaisons SSH
Créer un alias
1
2
echo "alias sshm='$HOME/scripts/ssh-manager.sh'" >> ~/.bash_aliases
source ~/.bash_aliases
La liste des serveurs $HOME/.ssh/.ssh_servers
1
2
3
4
IPv4v6;Alias;Adresse IP ou Domaine;Port;Clef;Opt;Chemin Local;Chemin Distant
xoyaz;yani;37.60.230.30;55030;xoyaz_xyz;;;Y;;4
iceyan;iceyan;185.112.146.46;55046;iceyan.xyz;;;Y;;4
icevps;hallmar;91.194.161.27;55027;icevps.xyz;;;Y;;4
Syncthing (INACTIF)
Syncthing est une application de synchronisation de fichiers pair à pair open source disponible pour Windows, Mac, Linux, Android, Solaris, Darwin et BSD. Aucun compte ni enregistrement préalable à l’utilisation auprès d’un tiers n’est nécessaire, ni même optionnelle. La sécurité et l’intégrité des données sont intégrées dans la conception du logiciel (https://fr.wikipedia.org/wiki/Syncthing)
Paquets Debian/Ubuntu
Pour permettre au système de vérifier l’authenticité des paquets, vous devez fournir la clé de version.
1
2
3
# Add the release PGP keys:
sudo mkdir -p /etc/apt/keyrings
sudo curl -L -o /etc/apt/keyrings/syncthing-archive-keyring.gpg https://syncthing.net/release-key.gpg
Le canal stable est mis à jour avec les versions stables, généralement tous les premiers mardis du mois.
1
2
# Add the "stable" channel to your APT sources:
echo "deb [signed-by=/etc/apt/keyrings/syncthing-archive-keyring.gpg] https://apt.syncthing.net/ syncthing stable" | sudo tee /etc/apt/sources.list.d/syncthing.list
Et finallement
1
2
3
# Update and install syncthing:
sudo apt-get update
sudo apt-get install syncthing
Utiliser Systemd pour configurer Syncthing en tant que service système
Le paquetage officiel Syncthing deb est livré avec le fichier de service systemd nécessaire. Dans le répertoire /lib/systemd/system/, vous trouverez un fichier syncthing@.service. Activez syncthing pour qu’il démarre automatiquement au démarrage en exécutant la commande ci-dessous.
Remplacez le nom d’utilisateur par votre nom d’utilisateur réel.
1
2
sudo systemctl enable syncthing@leno.service
sudo systemctl start syncthing@leno.service
Vérifier le statut
1
systemctl status syncthing@username.service
1
2
3
4
5
6
7
8
9
10
11
12
13
● syncthing@leno.service - Syncthing - Open Source Continuous File Synchronization for leno
Loaded: loaded (/lib/systemd/system/syncthing@.service; enabled; preset: enabled)
Active: active (running) since Sat 2024-06-22 11:02:15 CEST; 10s ago
Docs: man:syncthing(1)
Main PID: 706653 (syncthing)
Tasks: 18 (limit: 14162)
Memory: 28.2M
CPU: 1.474s
CGroup: /system.slice/system-syncthing.slice/syncthing@leno.service
├─706653 /usr/bin/syncthing serve --no-browser --no-restart --logflags=0
└─706661 /usr/bin/syncthing serve --no-browser --no-restart --logflags=0
juin 22 11:02:16 rnmkcy.eu syncthing[706653]: [SUJWS] INFO: Loading HTTPS certificate: open>
Nous pouvons voir que le démarrage automatique de Syncthing est activé et qu’il est en cours d’exécution.
Le service systemd syncthing crée des fichiers de configuration sous /home/username/.config/syncthing/ et un dossier /home/username/Sync comme dossier de synchronisation par défaut. Le fichier de configuration principal est /home/username/.config/syncthing/config.xml.
Désactiver Syncthing
1
2
sudo systemctl disable syncthing@leno.service
sudo systemctl stop syncthing@leno.service
Partitions LVM
Réduire la partion LVM thinkshare
Réduction à 120Go
en mode su
Arrêt samba
1
systemctl stop smb
On démonte et on force le check de la partition :
1
2
umount /sharenfs/
fsck.ext4 -fy /dev/mapper/think--vg-thinkshare
On regarde la taille de la partition à réduire :
$ lvs
1
2
3
4
5
6
LV VG Attr LSize Pool Origin Data% Meta% Move Log Cpy%Sync Convert
lvssd think-ssd -wi-ao---- 100,00g
home think-vg -wi-ao---- <64,24g
root think-vg -wi-ao---- <27,94g
swap_1 think-vg -wi-ao---- 976,00m
thinkshare think-vg -wi-a----- 371,65g
Ici je veux réduire à 120G, on va donc réduire à 119G. C’est pour être certain de ne perdre aucune donnée lorsque l’on va réduire le LV. Une fois le LV réduit à 120Go, on augmentera la taille du système de fichiers à celui du LV pour avoir nos 120G.
resize2fs /dev/mapper/think–vg-thinkshare 119G
On réduit le logical volume :
lvreduce -L 120G -v /dev/mapper/think–vg-thinkshare
On vérifie :
lvs
1
2
3
4
5
6
LV VG Attr LSize Pool Origin Data% Meta% Move Log Cpy%Sync Convert
lvssd think-ssd -wi-ao---- 100,00g
home think-vg -wi-ao---- <64,24g
root think-vg -wi-ao---- <27,94g
swap_1 think-vg -wi-ao---- 976,00m
thinkshare think-vg -wi-a----- 120,00g
On adapte la taille de notre système de fichiers pour atteindre les 120G :
resize2fs /dev/mapper/think–vg-thinkshare
Remontage
1
mount -a
Relance samba
1
systemct start smb
Augmenter taille partition LVM
LVM Resize – How to Increase an LVM Partition
Exemple : Agrandir de 50Go le volume logique LVM /dev/think-vg/nfs-share
Informations : sudo lvdisplay /dev/think-vg/nfs-share
1
2
3
4
5
6
7
8
9
10
11
12
13
14
15
16
--- Logical volume ---
LV Path /dev/think-vg/nfs-share
LV Name nfs-share
VG Name think-vg
LV UUID eflpKO-86o2-LviU-L5uj-71yn-cu3Z-NOfsQt
LV Write Access read/write
LV Creation host, time rnmkcy.eu, 2024-01-07 14:45:02 +0100
LV Status available
# open 1
LV Size 150,00 GiB
Current LE 51200
Segments 2
Allocation inherit
Read ahead sectors auto
- currently set to 256
Block device 254:3
Etendre le volume logique avec l’option -L pour augmenter le volume d’une taille spécifiée (M pour Mégaoctets, G pour Gigaoctets, T pour Téraoctets). Vous pouvez également supprimer le + pour augmenter le volume jusqu’à la quantité spécifiée
1
lvextend -L+50G /dev/think-vg/nfs-share
Alternativement, si vous souhaitez utiliser tout l’espace libre du groupe de volumes plutôt que de spécifier une taille à augmenter, exécutez lvextend -l +100%FREE
Redimensionner le système de fichiers. Cette opération permet d’étendre le système de fichiers de manière à ce qu’il occupe l’espace nouvellement créé à l’intérieur du volume logique.
1
resize2fs /dev/think-vg/nfs-share
Une fois que le système de fichiers a été redimensionné, l’espace devrait être prêt à être utilisé. Si vous exécutez la commande « df » pour visualiser l’espace disque, vous devriez constater qu’il a été augmenté avec succès.
1
df -h |grep "share"
1
/dev/mapper/think--vg-nfs--share 196G 61G 127G 33% /sharenfs
Augmenter taille SWAP
en mode su
Désactiver swap
1
swapoff -a
Augmenter taille swap LVM à 8Go
1
lvextend -L 8G /dev/think-vg/swap_1
Réactiver swap
1
swapon
Renouvellement Certificats SSL
Renouvellement auto des certificats par acme n’exécute pas le --reloadcmd , il faut exécuter un script dans une tâche cron
Les service de messagerie est assuré par msmtp
Le script de renouvellement ~/echeance_certificat.sh
1
2
3
4
5
6
7
8
9
10
11
12
13
14
15
16
17
18
19
20
21
22
23
24
25
26
27
28
29
30
31
32
33
34
35
36
37
38
39
#!/bin/bash
# Domaine
if [ -z "$1" ]
then
_domain="rnmkcy.eu"
else
_domain=$1
fi
echo $_domain
# Forcer le renouvellement par un 2ième argument , exemple 'force'
# Test expiration certificats
PEM="/etc/ssl/private/$_domain-fullchain.pem"
#
# 1 jour x 24 heures x 60 minutes x 60 secondes = 86 400
# 2 days in seconds
DAYS="172800"
_openssl="/usr/bin/openssl"
$_openssl x509 -enddate -noout -in "$PEM" -checkend "$DAYS" | grep -q 'Certificate will expire'
if [ $? -eq 0 -o ! -z "$2" ]
then
# certificat expire dans 2 jours , on renouvelle
echo "Force renouvellement des certificats Lets Encrypt"
"$HOME/.acme.sh"/acme.sh --force --cron --home "$HOME/.acme.sh" --renew-hook "$HOME/.acme.sh/acme.sh --ecc --install-cert -d $_domain --key-file /etc/ssl/private/$_domain-key.pem --fullchain-file /etc/ssl/private/$_domain-fullchain.pem --set-notify --notify-hook smtp"
#
echo "Recharge service nginx"
sudo systemctl reload nginx
#
# Envoi message
resul="Le certificat TLS/SSL ("$PEM") a été renouvellé sur "$_domain" ["$(date)"]"
# Si anomalie , ajout option --debug à msmtp
echo -e "Subject: Renouvellement certificat\r\nMIME-Version: 1.0\nContent-Type: text/; charset=utf-8\r\n\r\n"$resul |msmtp --from=postmaster@rnmkcy.eu -t yako@xoyize.xyz
else
echeance=$($_openssl x509 -enddate -noout -in "$PEM" |grep "notAfter=" |awk -F'=' '{print $2}')
#echo -e "Subject: Certificat\r\nMIME-Version: 1.0\nContent-Type: text/; charset=utf-8\r\n\r\nEchéance Certificat Domaine "$_domain" : "$echeance |msmtp --from=postmaster@rnmkcy.eu -t yako@xoyize.xyz
echo "Echéance Certificat Domaine "$_domain" : "$echeance
fi
Le rendre exécutable
1
chmod +x ~/echeance_certificat.sh
Créer la tâche
1
crontab -e
1
2
3
4
# serveur messagerie mx1.rnmkcy.eu
45 02 * * * "$HOME/.acme.sh"/acme.sh --cron --home "$HOME/.acme.sh" --renew-hook "$HOME/.acme.sh/acme.sh --ecc --install-cert -d 'mx1.rnmkcy.eu' --key-file /etc/maddy/certs/mx1.rnmkcy.eu/privkey.pem --fullchain-file /etc/maddy/certs/mx1.rnmkcy.eu/fullchain.pem" > /dev/null
# *.rnmkcy.eu
00 04 * * * $HOME/echeance_certificat.sh rnmkcy.eu
Les certificats seront renouvellés 7 jours avant l’échéance
Les échéances sont lisibles en exécutant acme.sh --list
1
2
3
Main_Domain KeyLength SAN_Domains CA Created Renew
mx1.rnmkcy.eu "ec-384" no LetsEncrypt.org 2024-06-03T08:20:04Z 2024-08-01T08:20:04Z
rnmkcy.eu "ec-384" *.rnmkcy.eu LetsEncrypt.org 2024-06-03T08:20:17Z 2024-08-01T08:20:17Z
Etat des lieux
Utilise un script bash nommé etat_des_lieux.sh dans le dossier ~/scripts/
Etendre Réduire
#!/bin/bash
# etat_des_lieux.sh
# Etat des lieux
echo "#################"
echo "#### disques ####"
echo "#################"
sudo fdisk -l |grep "/dev/"
echo "\n"
echo "#####################"
echo "Structure des volumes"
echo "#####################"
lsblk
echo "\n"
echo "###########################"
echo "#### points de montage ####"
echo "###########################"
mount |grep -E "/dev/mapper|/dev/sd"
echo "\n"
echo "########################################"
echo "#### versions nginx, php et mariadb ####"
echo "########################################"
sudo nginx -v && php --version && mysql --version
echo "\n"
echo "#####################"
echo "#### volumes LVM ####"
echo "#####################"
sudo pvs && sudo vgs && sudo lvs
echo "\n"
echo "##################################################################"
echo "#### fichiers de configuration nginx /etc/nginx/conf.d/*.conf ####"
echo "##################################################################"
tree -L 1 /etc/nginx/conf.d/
echo "\n"
echo "#######################################"
echo "#### dossiers 'root' des sites web ####"
echo "#######################################"
grep -E "root /" /etc/nginx/conf.d/*.conf
echo "\n"
echo "############################"
echo "#### fichier /etc/fstab ####"
echo "############################"
sudo cat /etc/fstab
echo "\n"
echo "####################################"
echo "#### points de montage des UUID ####"
echo "####################################"
findmnt --fstab --evaluateLe rendre exécutable
1
chmod +x ~/scripts/etat_des_lieux.sh
Créer un alias
1
2
echo "alias etat='$HOME/scripts/etat_des_lieux.sh'" >> ~/.bash_aliases
source ~/.bash_aliases